Sometimes, getting that perfect frothy milk for your coffee can be a bit tricky. You follow the steps, but the foam just doesn’t come out right. If you’ve ever wondered about 6 Reasons Your Milk Isn’t Frothing Properly, know that you’re not alone!
It’s a common hurdle for many home baristas. Don’t worry, this guide will break down the common issues in a simple way. We’ll show you exactly what to do, step by step, so you can enjoy creamy, frothy milk every time.
Let’s look at what might be going wrong and how to fix it.
Key Takeaways
- You’ll learn about the best types of milk for frothing.
- Understand how milk temperature affects froth.
- Discover the importance of your frothing technique.
- Find out how to clean your frothing tools properly.
- Learn about equipment issues that can cause frothing problems.
- Get tips on avoiding common mistakes.

Why Isn’t My Milk Frothing? Let’s Find Out
Making great coffee at home is a joy, especially when you can add that beautiful, creamy layer of froth to your latte or cappuccino. But what happens when you try, and the milk just sits there, flat and uninspired? It’s frustrating when you’re aiming for that café-quality drink, and it just doesn’t work out.
There are several simple reasons why your milk might not be frothing properly. Let’s explore the 6 Reasons Your Milk Isn’t Frothing Properly and how you can fix them easily.
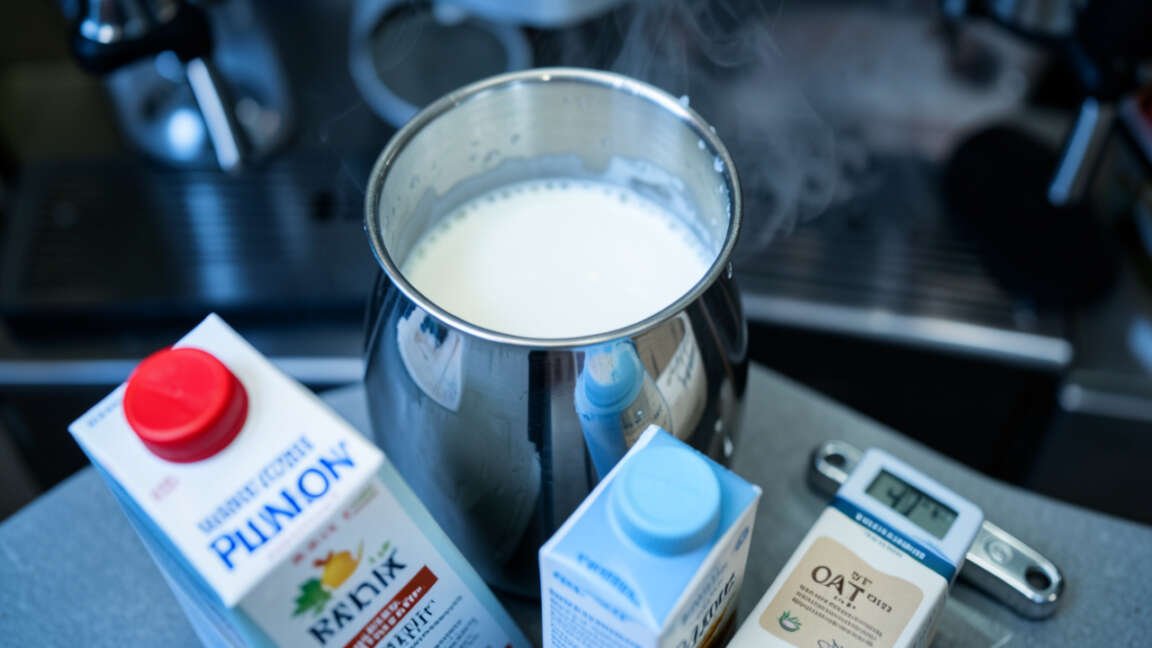
The Milk Itself Matters
The type of milk you use is probably the biggest factor in how well it froths. Some milks are naturally better at creating stable foam than others. This is due to their fat and protein content, which help trap air bubbles.
Whole Milk is Your Best Friend
For beginners and pros alike, whole milk is often considered the gold standard for frothing. The higher fat content helps create a richer, more stable foam that tastes great. Fat molecules help to bind air bubbles, making them last longer.
Other Dairy Options
2% milk can also froth reasonably well, though the foam might be a bit less dense than with whole milk. Skim milk can produce a lot of foam, but it tends to be airy and dissipates very quickly, often tasting watery.
Non-Dairy Milk Challenges
Many non-dairy milks are improving, but some can still be tricky. Oat milk, especially barista blends, froths very well because it’s often formulated with added oils and emulsifiers to mimic dairy milk. Almond milk and soy milk can be hit or miss; some brands froth better than others.
The key is looking for “barista edition” or “creamer” versions, which are designed for better performance.
Freshness is Key
Even the best type of milk won’t froth well if it’s old. Milk that’s past its prime has lost some of its protein structure, which is essential for creating foam. Always use fresh, cold milk for the best results.
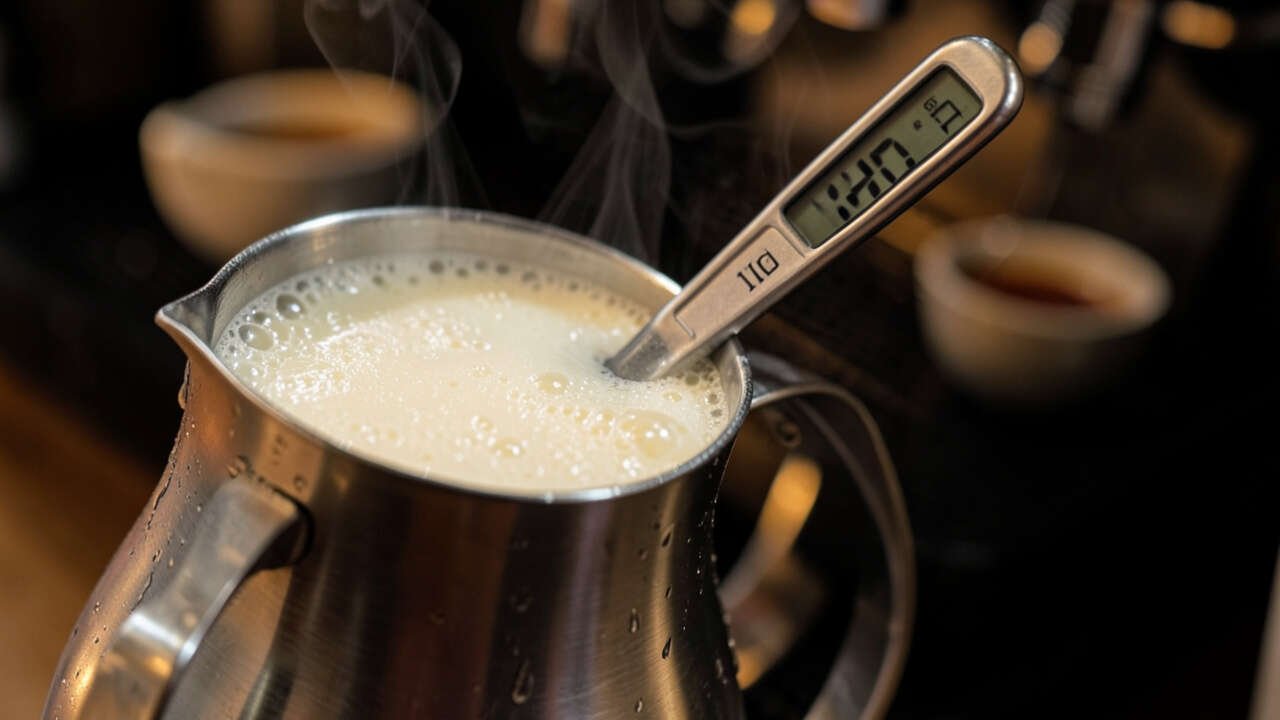
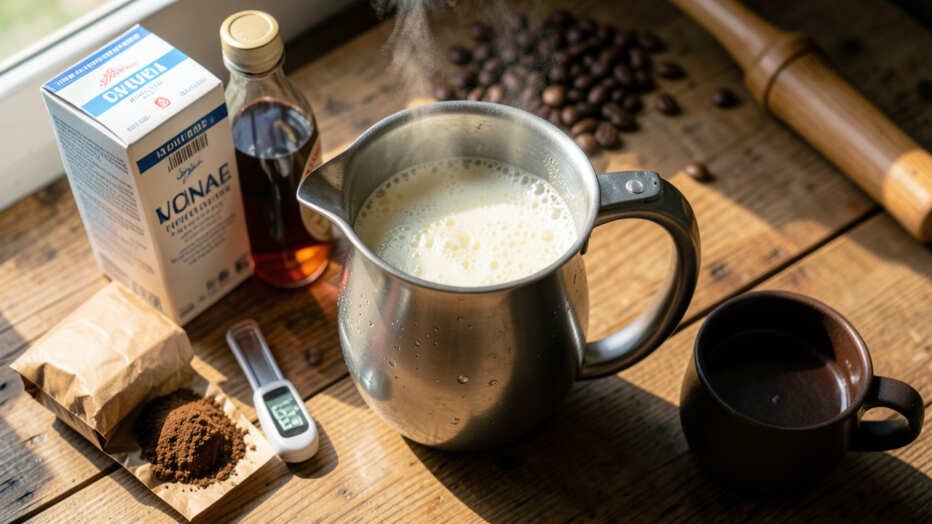
Temperature is Crucial
Getting the milk temperature just right is another vital step. Too cold, and it won’t froth effectively. Too hot, and you’ll scald the milk, which ruins both the taste and the ability to foam.
Cold Milk Froths Best
Always start with cold milk. This gives you more time to incorporate air and create foam before the milk gets too hot. Cold milk froths more efficiently because the proteins and fats are in a better state to capture air.
The Ideal Frothing Range
The sweet spot for frothing milk is between 140°F and 155°F (60°C and 68°C). If you don’t have a thermometer, aim to stop frothing just as the pitcher feels too hot to comfortably hold for more than a second or two.
Don’t Scald the Milk
Overheating milk breaks down the proteins and fats, making it impossible to create a stable foam. It also gives the milk a burnt, unpleasant taste. It’s better to stop a little early and reheat if needed than to overheat.
Your Frothing Technique Matters
How you introduce air into the milk makes a huge difference. There’s a technique to it, and mastering it is key to getting that silky texture.
Steaming Wand Technique
If you’re using an espresso machine with a steam wand, position the tip just below the surface of the milk. You want to hear a gentle “kissing” or “tearing paper” sound. This is the sound of air being incorporated.
Move the wand slightly up and down to create a vortex, which helps mix the air in evenly.
The ‘Whirlpool’ Effect
Once you’ve incorporated enough air (you’ll see the milk expand and get bubbly), submerge the steam wand a bit deeper into the milk. This creates a whirlpool effect that heats the milk and breaks down larger bubbles into microfoam, which is the fine, glossy foam you want.
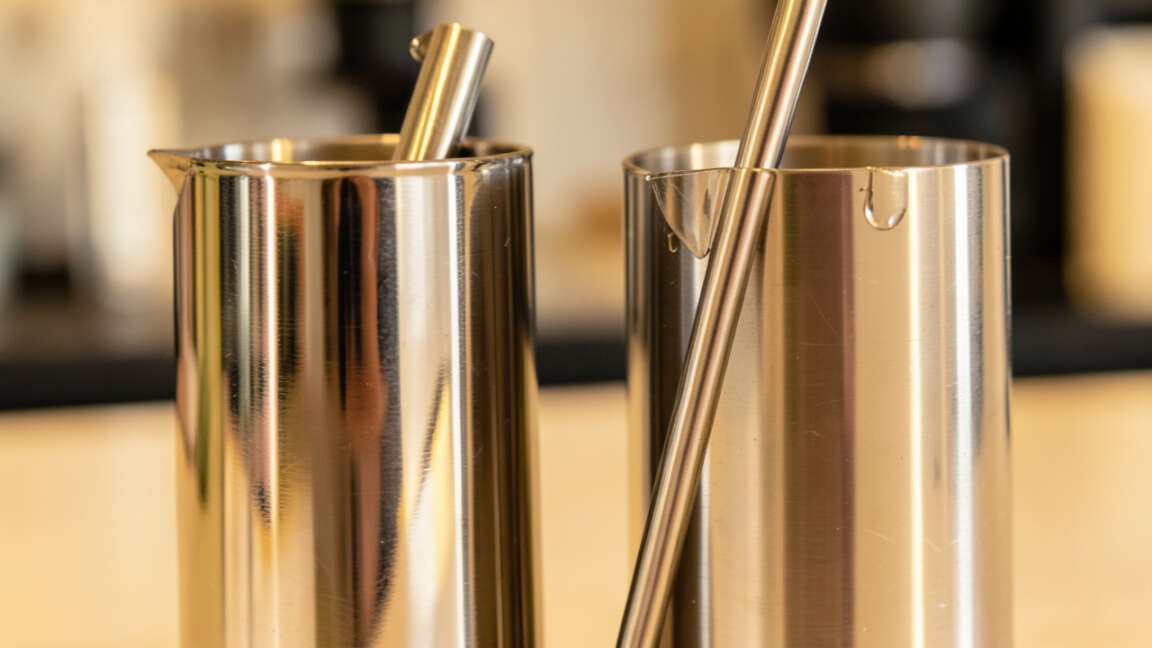
Pitcher Size and Type
Use a metal pitcher that is just large enough to hold the milk you need, plus some extra room for expansion. A pitcher that’s too big can make it hard to create that vortex. Metal pitchers conduct heat well, allowing you to feel the temperature change.
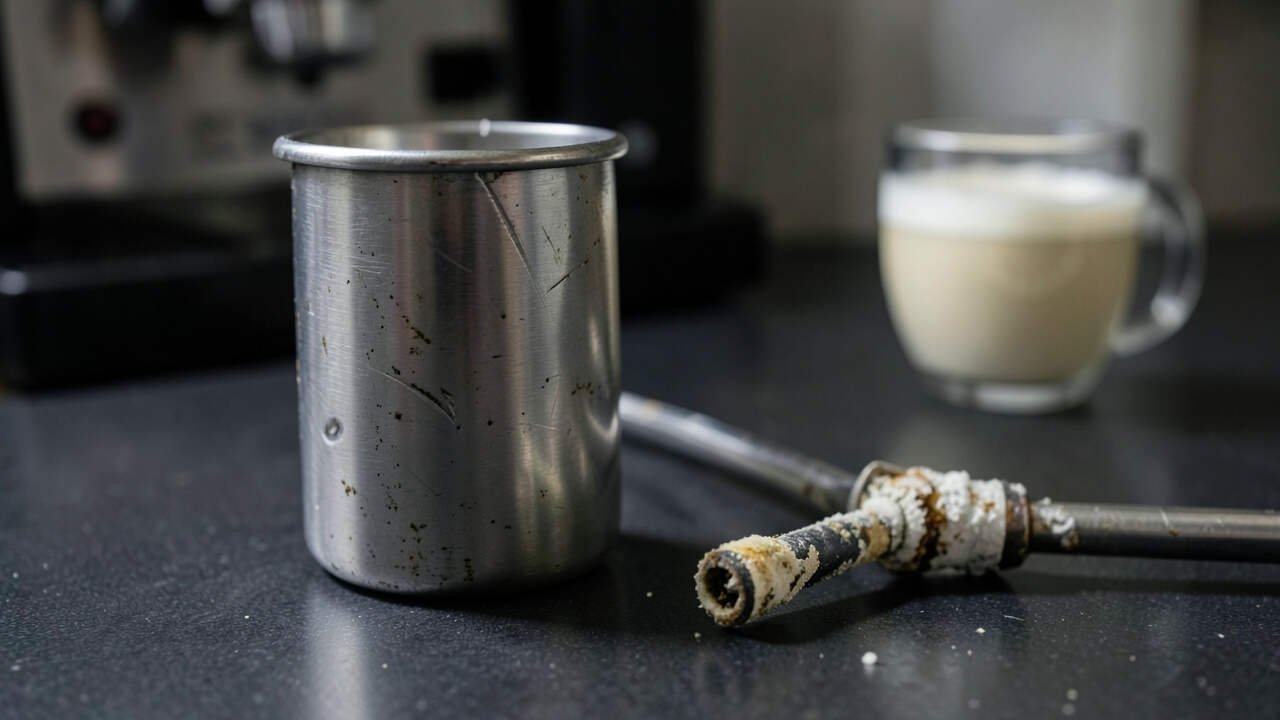
Clean Equipment is Essential
Dirty equipment can introduce impurities that prevent proper frothing and affect taste. Regularly cleaning your frothing tools is a must.
Steam Wand Care
After each use, wipe the steam wand with a damp cloth and purge it for a few seconds to clear any milk residue. If milk dries inside, it can clog the wand, reducing steam pressure and affecting performance.
Pitcher Hygiene
Wash your milk pitcher thoroughly after every use. Any leftover milk residue can turn rancid and interfere with future frothing attempts. Rinse it with hot water and a drop of dish soap, then dry it completely.
French Press and Handheld Frother Cleaning
If you use a French press or a handheld frother, make sure to wash all parts thoroughly. Food particles or old milk residue can prevent the whisk or plunger from moving freely and creating good foam.
Equipment Issues Can Hinder Frothing
Sometimes, the problem isn’t you or the milk, but the equipment you’re using.
Insufficient Steam Pressure
Espresso machines need adequate steam pressure to create good foam. If your machine is older or not performing well, the steam might be weak. This means it won’t have enough power to aerate the milk properly.
Problematical Frothers
Handheld electric frothers can sometimes lose power over time or have a whisk that doesn’t spin fast enough. If you’ve tried different milks and techniques without success, your frother might be the culprit.
French Press Foaming
While French presses are great for manual frothing, they require vigorous pumping. If the mesh is damaged or the plunger doesn’t seal well, you won’t get the aeration needed for good foam.
Common Mistakes to Avoid
Beyond the main reasons, a few common errors can trip up even experienced coffee lovers.
Not Enough Air (or Too Much)
It’s a balance. Too little air means flat milk. Too much air, introduced for too long, creates big, soapy bubbles that collapse quickly.
You need to aerate for a short time, then focus on texturing.
Aerating for Too Long
As mentioned, over-aerating is a problem. Once the milk has increased in volume and looks foamy, it’s time to stop adding air and start heating and texturing.
Starting with Warm Milk
Always use cold milk. Putting warm milk into a frother or under a steam wand means you’ll reach scalding temperatures much faster, limiting your frothing time and ruining the potential for good foam.
Incorrect Pitcher Angle
When steaming, the angle of your pitcher and the steam wand tip is important for creating that vortex. If the tip is too deep or too shallow, or the pitcher is held flat, you won’t get the right circulation for smooth microfoam.
Frequently Asked Questions
Question: Why does my oat milk not froth like dairy milk?
Answer: Not all oat milks are created equal! Regular oat milk has a different sugar and fat balance than dairy. Barista-edition oat milks are specifically formulated with extra fats and stabilizers to help them froth better and hold their foam, similar to dairy milk.
Question: Can I reheat milk that didn’t froth properly?
Answer: It’s best not to. Reheating milk, especially if it’s already been heated once, can alter its protein structure. This makes it even harder to froth and can negatively affect the taste, making it taste slightly burnt or cooked.
Question: How do I know if my milk is too hot?
Answer: The easiest way is by touch. When the outside of the milk pitcher feels too hot to comfortably hold for more than a second or two, the milk inside is likely around 160°F (71°C), which is generally too hot for optimal frothing and flavor. Aim to stop a little before that.
Question: Does the brand of milk really make a difference for frothing?
Answer: Yes, absolutely! For dairy milk, different brands might have slightly different fat percentages or be processed differently, affecting froth. For non-dairy milks, the difference is even more significant.
Always try to look for “barista-style” or “creamer” versions, as they are designed for frothing.
Question: My espresso machine’s steam wand seems weak. What can I do?
Answer: A weak steam wand might need servicing or descaling. If it’s a basic machine, it might just have lower steam pressure than professional models. Ensure you are using cold milk and have allowed the machine to heat up fully.
Sometimes, a simple handheld frother is a better option for machines with weak steam.
Final Thoughts
Getting that perfect froth on your milk is definitely achievable. By understanding the 6 Reasons Your Milk Isn’t Frothing Properly, you’re already halfway there. Always start with fresh, cold milk, preferably whole or a good barista-style non-dairy option.
Pay close attention to the temperature, aiming for that sweet spot between 140°F and 155°F. Practice your steaming technique to create a vortex and incorporate air just right. Keeping your equipment clean is non-negotiable for great results.
Don’t get discouraged; a little practice goes a long way!
![How Pressure Cookers Work Made Easy[1]](https://creativehouseblog.com/wp-content/uploads/2026/03/How_Pressure_Cookers_Work_Made_Easy1-768x448.jpg)
![6 Reasons Your Fried Food Turns Out Too Greasy[1]](https://creativehouseblog.com/wp-content/uploads/2026/04/6_Reasons_Your_Fried_Food_Turns_Out_Too_Greasy1-768x448.jpg)
![10 Ways To Automate Your Kitchen[1]](https://creativehouseblog.com/wp-content/uploads/2026/04/10_Ways_To_Automate_Your_Kitchen1-768x448.jpg)

![Fixing Common Toaster Problems Simply[1]](https://creativehouseblog.com/wp-content/uploads/2026/03/Fixing_Common_Toaster_Problems_Simply1-768x448.jpg)
![How to Descale an Electric Kettle Easily[1]](https://creativehouseblog.com/wp-content/uploads/2026/03/How_to_Descale_an_Electric_Kettle_Easily1-768x448.jpg)