Cleaning your blender might seem like a chore, especially when you just want to enjoy your smoothie.
For many people, especially those new to using blenders, the idea of tackling leftover fruit bits or sticky residue can feel a bit tricky. But don’t worry!
It’s much simpler than you might think. We’ll show you a super easy, step-by-step method for How to Clean a Blender Quickly so you can get back to sipping your delicious creations in no time. Get ready to learn a neat trick!
Key Takeaways
- You can clean your blender with just soap and water.
- Running the blender with soap and water is a fast cleaning method.
- Dish soap and warm water work best for cleaning.
- Always make sure the blender is unplugged before cleaning.
- Rinsing thoroughly removes all soap residue.
- Drying your blender prevents water spots.
![How To Clean A Blender Fast And Easy[1]](https://creativehouseblog.com/wp-content/uploads/2026/03/How_To_Clean_A_Blender_Fast_And_Easy1.jpg)
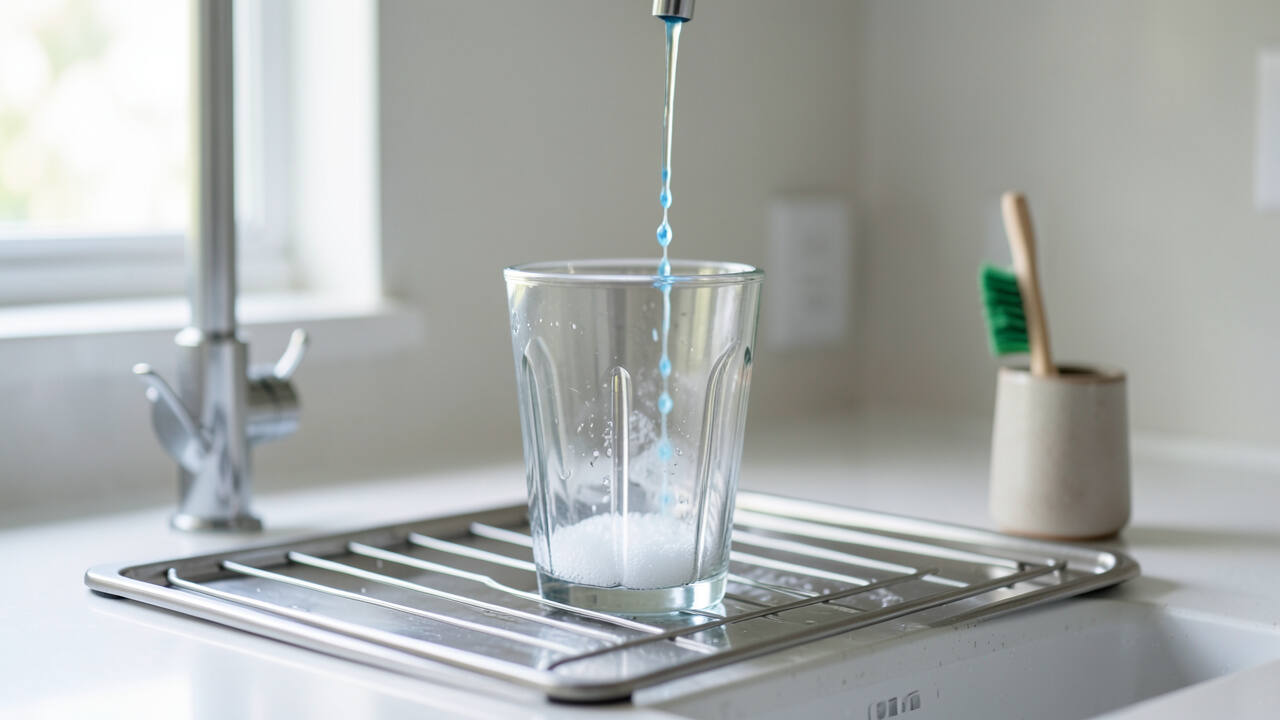
How to Clean a Blender Quickly
The Need for a Speedy Blender Clean
Blenders are kitchen workhorses. We use them for smoothies, soups, sauces, and more. After whipping up something tasty, the last thing anyone wants to do is spend a long time scrubbing.
Sticky ingredients, seeds, and leafy greens can cling to the blades and jar. If left too long, they can become harder to remove. Knowing how to clean a blender quickly saves you time and keeps your blender in good shape for your next use.
Why a Quick Clean Matters
A fast clean prevents buildup. This buildup can affect how well your blender works over time and might even lead to smells. Plus, nobody likes a dirty appliance hanging around.
A simple, quick method means you’ll be more likely to clean it right away, every time. This simple habit ensures your blender is always ready when you need it, fresh and ready for action.
The Simplest Way to Clean Your Blender
There’s a magic trick for cleaning blenders that is incredibly fast. It uses the power of the blender itself to do most of the work. This method is perfect for everyday cleaning after making drinks or simple sauces.
It’s so easy that beginners can master it in seconds. You’ll be amazed at how clean your blender can get with very little effort.
What You Will Need
Gathering your supplies is easy. You likely have everything you need in your kitchen right now. This makes the process even faster because there’s no need to run to the store.
Having these items ready means you can clean your blender the moment you finish using it.
- Dish soap
- Warm water
- Your blender
- A soft cloth or paper towel
Step-by-Step Guide to a Quick Clean
Follow these easy steps to get your blender sparkling clean in no time. The goal is to make this process so simple that you’ll never dread cleaning your blender again. Each step is designed to be straightforward and effective.
Step 1 Unplug Your Blender
Safety first! Before you do anything else, make sure your blender is unplugged from the wall. This is a critical step to avoid any accidents.
Never put your hands or any objects near the blades while the blender is connected to power.
Step 2 Add Soap and Water
Pour some warm water into the blender jar. You don’t need to fill it all the way, about halfway or two-thirds full is perfect. Then, add a small squirt of your favorite dish soap.
Just a little bit will do; you don’t want too many suds.
Step 3 Blend It Up
Put the lid on your blender securely. Place the jar back onto the blender base. Now, turn the blender on for about 30 seconds to a minute.
Let it run on a medium speed. You’ll see the soap and water swirl around, creating suds that will clean the blades and the inside of the jar.
Step 4 Rinse Thoroughly
After blending, unplug the blender again. Carefully remove the blender jar from the base. Pour out the soapy water.
Now, fill the jar with clean, fresh water. Put the lid back on and blend again for another 20-30 seconds. This step rinses away all the soap and any remaining food bits.
Step 5 Drain and Dry
Pour out the rinse water. Now, turn the jar upside down to let any remaining water drip out. You can also gently wipe the inside and outside of the jar with a soft cloth or paper towel.
Make sure the jar and lid are completely dry before reassembling or storing them. This prevents water spots and keeps everything fresh.
Dealing with Stubborn Stains or Residue
Sometimes, even the quick method might leave a little something behind, especially if you waited a bit too long to clean. Don’t worry; there are a couple of extra tricks you can use. These are still very simple and won’t take much extra time.
Using Baking Soda for Tough Spots
If you have dried-on gunk or stubborn stains, a paste of baking soda and water can work wonders. Make a thick paste by mixing baking soda with a little water. Apply this paste to the stained areas inside the blender jar.
Let it sit for a few minutes. Then, you can use a soft sponge or cloth to gently scrub the area. Rinse thoroughly afterwards.
Vinegar for Odors and Disinfection
Vinegar is great for tackling persistent odors and offers a bit of disinfecting power. Fill the blender jar with equal parts white vinegar and water. Let this mixture sit in the jar for about an hour, or even overnight if the smell is strong.
After soaking, rinse the jar very well with clean water and follow the regular quick cleaning steps.
Cleaning the Blender Base and Lid
Don’t forget the other parts of your blender! The lid and the base also need attention.
Cleaning the Lid
The lid usually just needs a good wash with warm, soapy water. Make sure to get into any crevices where food might hide. Some blender lids are also dishwasher safe, so check your manual if you have one.
Cleaning the Blender Base
The blender base should never be submerged in water. To clean it, make sure it’s unplugged. Wipe down the exterior of the base with a damp cloth.
If there’s any spilled food or drink on the base, gently wipe it away. For dried-on messes, you might need to use a slightly damp cloth with a tiny bit of dish soap, then wipe again with a clean, damp cloth to remove the soap residue.
When to Do a Deeper Clean
For most daily use, the quick method is perfect. However, once in a while, you might want to give your blender a more thorough cleaning. This is especially true if you’ve been blending very sticky ingredients like dates or nut butters, or if you notice any lingering smells.
A deeper clean ensures all parts are spotless.
Disassembling for a Deep Clean
Some blenders allow you to detach the blades from the jar for a more thorough cleaning. Check your blender’s manual to see if yours can be disassembled. If so, carefully unscrew the blade assembly.
Wash the blades, gasket, and jar separately with warm, soapy water. Use a brush to gently clean around the blade edges. Be very careful with the sharp blades!
Using a Brush for Blades
When cleaning the blades, even if you don’t disassemble the blender, a small bottle brush or an old toothbrush can be very helpful. These tools can reach the areas around the blades more effectively than your fingers or a sponge alone. Always work carefully and ensure the blender is unplugged.
Maintaining Your Blender for Longevity
Keeping your blender clean is a big part of making it last. A well-maintained blender will perform better and serve you for many years.
Regular Cleaning Habits
The best maintenance is regular cleaning. Make it a habit to do the quick clean right after each use. This prevents food from drying and becoming difficult to remove.
A clean blender is a happy blender!
Checking for Wear and Tear
While cleaning, take a moment to look over your blender. Check the jar for any cracks or damage. Inspect the seal on the lid and the blade assembly to make sure they are in good condition.
If you notice any issues, it might be time to consider replacing parts or the entire blender.
FAQ Of How To Clean A Blender Fast And Easy
Question: How often should I clean my blender
Answer: It’s best to clean your blender immediately after each use, especially after making smoothies or anything with sticky ingredients. This quick clean prevents food from drying and becoming hard to remove.
Question: Can I put my blender jar in the dishwasher
Answer: Many blender jars are dishwasher safe, but it’s always best to check your blender’s instruction manual. The lid is often dishwasher safe too. However, the base should almost always be wiped clean by hand.
Question: What should I do if my blender still smells after cleaning
Answer: If a smell lingers, try filling the blender jar with equal parts white vinegar and water. Let it sit for an hour or two, then rinse thoroughly. You can also try blending a lemon wedge with water for a fresh scent.
Question: Are there any special cleaners I need for my blender
Answer: No, you don’t need special cleaners. Regular dish soap and warm water are usually sufficient. For tougher jobs, baking soda or vinegar can be used as natural cleaning agents.
Question: How do I clean the blender blades safely
Answer: Always make sure the blender is unplugged before cleaning the blades. For the quick method, the blending action does the work. If you need to scrub, use a brush carefully or a soft cloth, and be very cautious of their sharpness.

Final Thoughts
You have learned how to make your blender shine with just soap and water and a few seconds of blending.
This simple approach saves you time and keeps your kitchen tool ready for action. Following these steps ensures your blender is clean and fresh after every use.
Enjoy making all your favorite recipes!
![What Is a Slow Cooker Used For[1]](https://creativehouseblog.com/wp-content/uploads/2026/03/What_Is_a_Slow_Cooker_Used_For1-768x448.jpg)
![Signs Your Boiler Needs Servicing Before It Breaks Down[1]](https://creativehouseblog.com/wp-content/uploads/2026/05/Signs_Your_Boiler_Needs_Servicing_Before_It_Breaks_Down1-768x403.jpg)
![Air Fryer Maintenance Guide For Beginners[1]](https://creativehouseblog.com/wp-content/uploads/2026/03/Air_Fryer_Maintenance_Guide_For_Beginners1-768x448.jpg)
![10 Tips To Get Perfect Crispy Pizza At Home[1]](https://creativehouseblog.com/wp-content/uploads/2026/04/10_Tips_To_Get_Perfect_Crispy_Pizza_At_Home1-768x448.jpg)
![Troubleshooting Common Espresso Machine Issues[1]](https://creativehouseblog.com/wp-content/uploads/2026/03/Troubleshooting_Common_Espresso_Machine_Issues1-768x448.jpg)
![8 Benefits Of Sous Vide Cooking At Home[1]](https://creativehouseblog.com/wp-content/uploads/2026/04/8_Benefits_Of_Sous_Vide_Cooking_At_Home1-768x448.jpg)