Making perfect thin crepes might seem tricky at first, but it doesn’t have to be hard! Many people find them a bit challenging when they start. You might worry about them sticking or tearing.
But don’t you worry! We’re here to show you a super simple way to get them just right, every single time. Get ready for some easy steps that will make your crepe-making dreams come true.
Key Takeaways
- You’ll learn the best way to mix your crepe batter for a smooth, lump-free consistency.
- Discover how to get your pan just the right temperature for perfect crepes.
- Find out the secret to spreading the batter thinly and evenly.
- Understand how to tell when your crepe is ready to flip.
- Learn tips for keeping your crepes warm as you make more.
- Get simple advice for choosing the right ingredients.
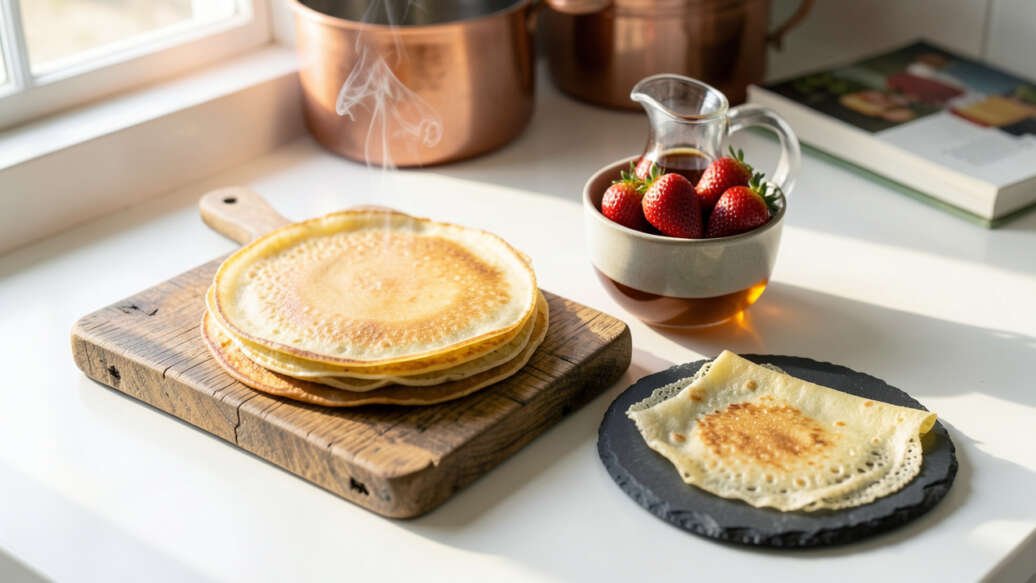
The Magic of Thin Crepes
What Makes Thin Crepes Special
Thin crepes are like delicate little pancakes. They are so light and airy, perfect for filling with sweet or savory things. Because they are so thin, they cook very quickly.
This means you can whip up a big batch fast! People love them because they are so versatile. You can have them for breakfast, lunch, or even dessert.
They are a blank canvas for your favorite flavors.
Why Beginners Sometimes Struggle
When you’re new to making crepes, a few things can trip you up. The batter consistency is key. Too thick, and they won’t be thin enough.
Too thin, and they might fall apart. Getting the pan temperature just right is also important. If it’s too hot, they burn before they cook through.
If it’s not hot enough, they might stick. And spreading the batter evenly can take a little practice. It’s all about finding that balance.
8 Tips for Perfect Thin Crepes Every Time
1. The Perfect Batter Mix
This is where it all starts. For good crepes, you need a smooth batter. The easiest way to get this is to mix your wet and dry ingredients separately first.
Then, slowly add the wet to the dry while whisking. This helps avoid lumps. Many recipes use flour, eggs, milk, and a little bit of butter or oil.
Sometimes a pinch of sugar helps too. Don’t overmix the batter! Just mix until everything is combined.
A slightly rested batter is often better, so let it sit for about 30 minutes in the fridge. This lets the flour absorb the liquid.
2. Getting Your Pan Ready
Your pan is your best friend when making crepes. A non-stick skillet or a crepe pan works wonderfully. The key is the heat.
You want it to be medium to medium-high. How do you know it’s ready? You can test it by flicking a tiny bit of water onto the pan.
If it sizzles and evaporates quickly, your pan is hot enough. If it just sits there, it’s too cool. If it burns up instantly, it’s too hot.
You might need to adjust the heat as you go.
3. The Gentle Spread
Once your batter is ready and your pan is hot, it’s time to spread the batter. Pour a ladleful of batter into the center of the hot pan. Then, immediately tilt and swirl the pan in a circular motion.
This spreads the batter thinly and evenly all over the bottom. You want a nice, thin layer. Don’t make it too thick!
A little practice with swirling will help you get it just right. You don’t need a lot of batter for each crepe.
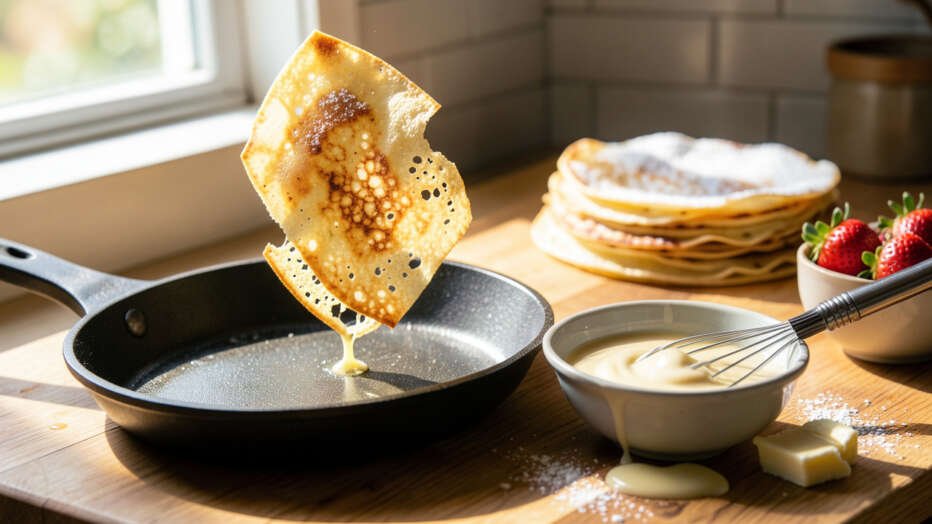
4. Knowing When to Flip
Timing is everything with crepes. You’ll see the edges start to look dry and slightly golden. The surface of the crepe will also look cooked, with fewer shiny spots.
Usually, this takes about 1 to 2 minutes. When you see these signs, it’s time to flip. Gently lift an edge with a thin spatula to check the bottom.
If it’s a beautiful golden brown, you’re ready! A quick, confident flip is best. A bent spatula can help you get underneath easily.
5. The Art of Flipping
Flipping a crepe can seem a bit scary, but it’s easier than you think. Slide a thin, flexible spatula under the crepe. Lift it gently to peek at the underside.
If it looks nicely golden, give it a quick, firm flip. You can also try tossing it in the air if you’re feeling brave! Most people find using a spatula works well and is less messy.
Don’t worry if your first few aren’t perfect. They still taste good!
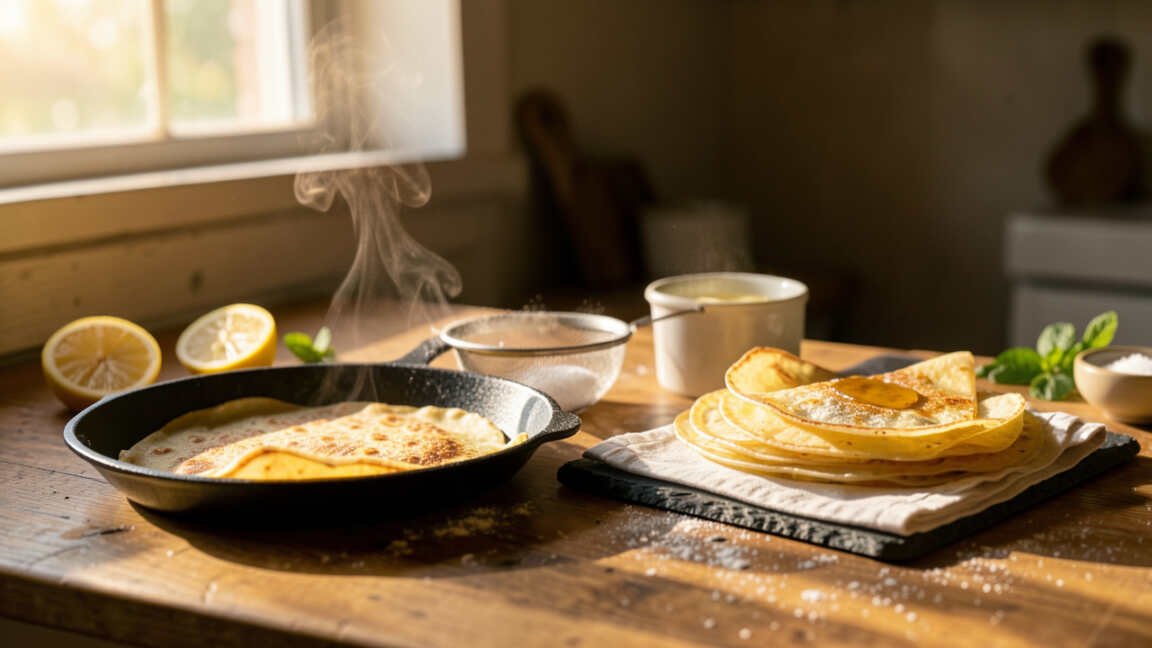
6. Keeping Them Warm
As you make more crepes, you’ll want to keep the cooked ones warm. The best way is to stack them on a plate and loosely cover them with foil or a clean kitchen towel. You can also place the plate on top of a pot of gently simmering water.
This creates a warm environment without steaming them too much. This way, everyone can enjoy warm crepes together.
7. Ingredient Quality Matters
Using good quality ingredients makes a difference. Fresh eggs, good milk, and decent flour will result in better-tasting crepes. If you’re adding butter to your batter, a little bit of melted unsalted butter gives a nice flavor.
For a richer crepe, you can use half milk and half cream. Using a neutral oil like vegetable or canola oil for greasing the pan works well.
8. Don’t Forget the Flavor Boost
While the batter itself can be simple, you can add little extras to boost the flavor. A splash of vanilla extract is lovely for sweet crepes. A bit of lemon or orange zest can add a bright, fresh taste.
For savory crepes, you might add a pinch of salt and pepper, or even some finely chopped herbs like chives or parsley directly into the batter. These small additions can really make your crepes shine.
Frequently Asked Questions
Question: What is the best flour to use for thin crepes?
Answer: All-purpose flour is usually the best choice for thin crepes. It’s readily available and works well for creating a smooth batter.
Question: How long should I rest my crepe batter?
Answer: Resting your crepe batter for about 30 minutes in the refrigerator is recommended. This allows the gluten to relax, making the crepes more tender.
Question: Can I make crepe batter ahead of time?
Answer: Yes, you can make crepe batter a day in advance. Store it in an airtight container in the refrigerator. You might need to whisk it a bit before using it.
Question: My crepes are sticking to the pan. What should I do?
Answer: Make sure your pan is hot enough before you add batter. Also, ensure you’re using enough butter or oil to lightly grease the pan between crepes, and use a good non-stick pan.
Question: What are some good fillings for thin crepes?
Answer: For sweet crepes, try fruit, whipped cream, chocolate sauce, or jam. For savory crepes, consider cheese, ham, spinach, mushrooms, or chicken.
Final Thoughts
Making perfect thin crepes is totally achievable with these simple steps. You’ve learned how to get that smooth batter, the right pan heat, and the easy spreading technique. You know when to flip and how to keep them warm.
Plus, you know how a few ingredient tweaks can make a big difference. With a little practice, you’ll be making delicious crepes that impress everyone. Just remember to be patient, and enjoy the process.
Happy crepe making!
![Electrical Safety Checks Every Homeowner Should Know[1]](https://creativehouseblog.com/wp-content/uploads/2026/05/Electrical_Safety_Checks_Every_Homeowner_Should_Know1-768x403.jpg)
![9 Drinks You Can Make With A Milk Frother[1]](https://creativehouseblog.com/wp-content/uploads/2026/04/9_Drinks_You_Can_Make_With_A_Milk_Frother1-768x448.jpg)
![When to Use a Food Processor Versus Blender[1]](https://creativehouseblog.com/wp-content/uploads/2026/03/When_to_Use_a_Food_Processor_Versus_Blender1-768x448.jpg)
![How to Clean Your Coffee Maker Easily[1]](https://creativehouseblog.com/wp-content/uploads/2026/03/How_to_Clean_Your_Coffee_Maker_Easily1-768x448.jpg)
![How Rice Cookers Work Explained Simply[1]](https://creativehouseblog.com/wp-content/uploads/2026/03/How_Rice_Cookers_Work_Explained_Simply1-768x448.jpg)
![10 Benefits Of Using An Indoor Electric Grill At Home[1]](https://creativehouseblog.com/wp-content/uploads/2026/04/10_Benefits_Of_Using_An_Indoor_Electric_Grill_At_Home1-768x448.jpg)