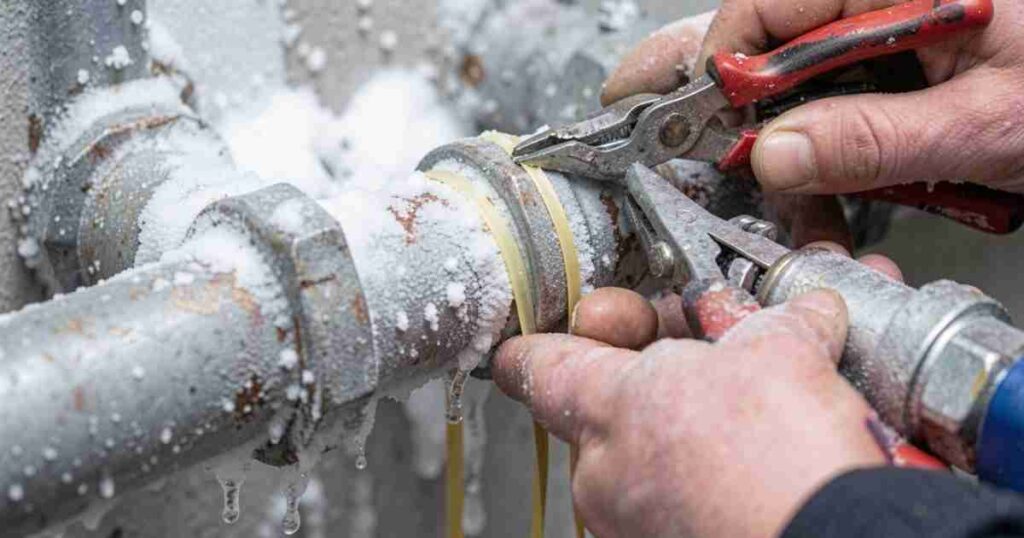
Keeping your home warm in winter is important, but so is keeping your pipes safe. Many people find it tricky to know how to protect pipes from freezing in winter, especially if they’re new to dealing with cold weather. It can seem like a lot of work, but it’s actually pretty simple once you know the steps.
This guide will show you exactly what to do, step by step, so you can relax knowing your pipes are safe from the cold.
Key Takeaways
- Understand why pipes freeze and the damage it can cause.
- Learn easy ways to insulate pipes in vulnerable areas.
- Discover how to keep water flowing to prevent freezing.
- Find out how to handle pipes that are already frozen.
- Get tips on what to do before and during a cold snap.
![How to Protect Pipes From Freezing in Winter[1]](https://creativehouseblog.com/wp-content/uploads/2026/05/How_to_Protect_Pipes_From_Freezing_in_Winter1.jpg)
Why Pipes Freeze and How to Protect Them
Understanding How to Protect Your Pipes from Freezing in Winter
When winter arrives, the cold can sneak into our homes and cause real problems for our plumbing.
Pipes, especially those that run through unheated spaces like basements, crawl spaces, attics, or garages, are very vulnerable. If the water inside them gets cold enough, it freezes.
When water freezes, it expands. This expansion puts immense pressure on the inside of the pipe. If this pressure becomes too great, the pipe can burst.
A burst pipe can cause serious water damage to your home, leading to costly repairs and a lot of mess.
Knowing how to protect your pipes from freezing in winter is a key part of home maintenance during the colder months. It’s about taking simple steps to prevent a big problem.
The Science of Freezing Pipes
Water is a fascinating substance. When it turns into ice, its molecules arrange themselves in a crystalline structure that takes up more space. This is why ice floats – it’s less dense than liquid water.
In a pipe, this expansion has nowhere to go. It pushes outwards against the pipe walls.
Imagine trying to stuff too many clothes into a suitcase. The suitcase strains. A pipe is similar; the expanding ice strains its material.
If the pipe is old, already weakened, or made of a less flexible material, it’s more likely to crack or burst under this pressure. Even small cracks can leak a lot of water very quickly.
Common Causes of Frozen Pipes
Several things make pipes more likely to freeze. The most obvious is a drop in outdoor temperature. But internal factors also play a big role.
Pipes in uninsulated areas are a prime target. This includes walls, attics, garages, and crawl spaces where cold air can easily reach them.
Even pipes inside your home can freeze if a room is left unheated for too long, like a seldom-used guest room during a very cold spell.
Another factor is stagnant water. If water isn’t moving, it has more time to get cold. This is why pipes that are used less often are at higher risk.
Think about outdoor faucets or pipes leading to guest bathrooms that are only used occasionally. These become targets for the freezing temperatures.
Consequences of Burst Pipes
The aftermath of a burst pipe is never good. Water damage can affect walls, ceilings, floors, insulation, and even electrical wiring.
Mold can start to grow in damp conditions, which is bad for your health and expensive to remove.
The cost of repairing water damage, replacing damaged belongings, and fixing the burst pipe itself can quickly add up to thousands of dollars.
Beyond the financial cost, there’s the stress and inconvenience of dealing with a major home emergency. This makes taking preventative measures to protect your pipes well worth the effort.
Simple Ways to Insulate Your Pipes
Insulating your pipes is one of the most effective ways to prevent them from freezing. Insulation acts like a warm blanket for your pipes, slowing down the rate at which heat escapes from the water inside.
This is especially important for pipes that are exposed to cold air, like those in basements, crawl spaces, garages, or under sinks.
There are several easy and affordable ways to add insulation.
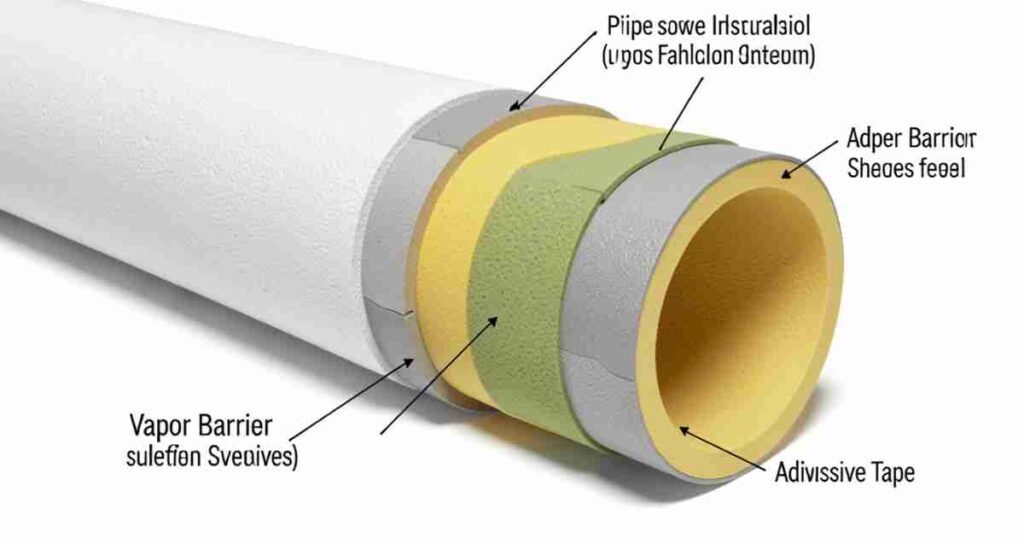
Pipe Insulation Sleeves
One of the easiest and most common methods is using foam pipe insulation sleeves. These are pre-slit foam tubes that you simply wrap around your pipes. They come in various sizes to fit different pipe diameters.
You can find them at most hardware stores.
To install them, measure the length of pipe you need to cover. Cut the foam sleeve to size if necessary. Then, just slip the sleeve over the pipe.
The pre-slit design usually allows you to easily snap it around the pipe. Some sleeves have adhesive strips to seal the seam. Make sure the seam is well-sealed to prevent cold air from getting in.
For longer runs, you might use tape to secure the sleeves further. This is a DIY project that takes very little time and can make a big difference.
Heat Tape and Cables
For areas that are extremely cold or where insulation alone isn’t enough, you can use electric heat tape or cables.
These products are designed to be wrapped around pipes and plugged into an electrical outlet. They generate a small amount of heat to keep the pipe warm.
Heat tape comes in different lengths. You’ll need to choose a length appropriate for the section of pipe you want to protect. Follow the manufacturer’s instructions carefully when installing heat tape.
It’s important to wrap it evenly and avoid overlapping the tape, as this can cause overheating.
Some types are self-regulating, meaning they only produce heat when needed. Always use products that are specifically designed for preventing frozen pipes, and ensure they are installed safely.
Weather Stripping and Caulk
While not directly applied to pipes, sealing air leaks around them is crucial. Cold air can seep into attics, crawl spaces, and basements through small gaps. Weather stripping and caulk are your best friends here.
Use caulk to seal cracks and openings in walls, floors, and around windows and doors in unheated areas.
Weather stripping can be applied around door and window frames to create a tighter seal. By preventing cold air from entering these spaces, you create a slightly warmer environment, which helps protect the pipes running through them.
This is a simple step that complements pipe insulation.
DIY Insulation Methods
If you can’t get to a store or want to use materials you have on hand, there are some DIY insulation methods.
Old towels, blankets, or rags can be wrapped around pipes. Secure them with tape or string.
While not as effective as specialized foam sleeves, they can offer some temporary protection.
For more permanent solutions using common materials, you could use fiberglass insulation or even old newspapers.
Wrap them tightly around the pipes and cover them with plastic sheeting or tape to keep them dry.
However, be cautious when using materials like fiberglass, which can be irritating to the skin and lungs.
Always ensure any DIY insulation is kept dry, as moisture can reduce its effectiveness and encourage mold growth.
Keeping Water Moving to Prevent Freezing
One of the most effective ways to stop pipes from freezing is to keep water moving. Moving water is much less likely to freeze than still water. Even a slow drip can make a significant difference during very cold weather.
This method is particularly useful for faucets and pipes that are in areas prone to freezing.
Letting Faucets Drip
During a cold snap, letting a faucet drip slowly can prevent the water inside the pipes from freezing.
It doesn’t need to be a strong flow, just a steady drip. This is especially recommended for faucets that supply outdoor hoses or are connected to pipes that run through colder parts of your house.
Choose a faucet that is on an exterior wall or in a particularly vulnerable location. Turn it on just enough to get a slow, steady drip.
This constant flow of water, even if it’s cold, helps to move the water within the pipe, preventing it from becoming completely still and freezing.
This simple action can save you from a lot of trouble.
Opening Cabinet Doors
For pipes located under sinks, especially those in kitchens or bathrooms, opening the cabinet doors can help.
This allows warmer air from the room to circulate around the pipes. Cold air tends to settle in these enclosed spaces, making the pipes more susceptible to freezing.
Simply open the cabinet doors beneath your sinks. This creates an open pathway for air. If the room itself is kept at a reasonably warm temperature, this extra airflow can be enough to keep the water in the pipes from getting too cold.
This is a quick and easy step that often overlooked.
Using a Hose Bib Cover
Outdoor faucets, also known as hose bibs or spigots, are extremely vulnerable to freezing. They are directly exposed to the elements. A simple way to protect them is by using a hose bib cover.
These are insulated covers that fit over the faucet.
Before winter arrives, disconnect any hoses from the outdoor faucets. Water remaining in the hose can freeze and damage the faucet. Then, screw on an insulated hose bib cover.
These covers are readily available at hardware stores and are very inexpensive. They add a layer of insulation to protect the faucet from the cold.
Understanding Water Flow Dynamics
The concept behind keeping water moving relies on a basic principle of thermodynamics and fluid dynamics. Heat transfer is a key factor. Water loses heat to its colder surroundings.
When water is still, the layer of water closest to the cold pipe wall loses heat more rapidly. As this layer cools and eventually freezes, it acts as an insulator, slowing down heat loss from the inner parts of the water. However, if there is continuous flow, the colder water is constantly being
Consider this: A still pool of water will freeze from the top down and sides inward. A flowing river, however, can remain liquid at temperatures below freezing point due to the constant motion and the inherent property of water to release latent heat as it freezes, which is then carried away by the flow.
While your pipes don’t have a river’s flow, a slow drip mimics this principle on a smaller scale, constantly bringing in slightly less cold water and carrying away chilled water.
How to Deal With Frozen Pipes
If, despite your best efforts, your pipes do freeze, it’s important to know how to deal with them safely. The goal is to thaw the ice without causing further damage.
Never use an open flame to thaw pipes, as this can cause a fire or damage the pipe itself.
Identifying a Frozen Pipe
The first sign of a frozen pipe is usually a lack of water when you turn on a faucet. You might hear a faint gurgling sound, or the water pressure might be very low. Visually inspect exposed pipes in vulnerable areas for any frost or ice build-up.
Sometimes, you can see a bulge in the pipe where the ice is forming.
If you have no water from a specific faucet, and other faucets in the house are working, it’s likely a localized freeze. If all faucets are dry, you may have a more widespread problem with your main water line. It’s important to turn off the main water supply to your house if you suspect a burst pipe to prevent further water damage.
Thawing Frozen Pipes Safely
Once you’ve located the frozen section of pipe, you can begin the thawing process. The safest methods involve gentle, indirect heat.
One common method is to wrap the frozen pipe with towels or rags and then pour very hot water over them. Keep the towels wet with hot water. Another option is to use a hairdryer.
Hold the hairdryer a few inches away from the pipe and move it back and forth along the frozen section. Do not concentrate the heat in one spot for too long.
If you have an electric heat cable specifically designed for thawing pipes, you can use that, following the manufacturer’s instructions.
For pipes located in cabinets, open the doors and use a hairdryer or portable heater set to a low setting to warm the area.
When to Call a Professional
There are times when it’s best to call a professional plumber. If you cannot locate the frozen section, if the frozen pipe is in a difficult-to-access area, or if you suspect the pipe has already burst, contact a plumber immediately. They have the tools and expertise to safely thaw pipes or repair any damage.
Attempting to thaw a pipe in a way that could cause damage or injury can lead to more expensive repairs.
If you’re uncomfortable with any part of the thawing process, don’t hesitate to call for expert help.
A burst pipe is a serious issue, and professional intervention is often the quickest and safest solution.
Dealing with a Burst Pipe
If you discover a burst pipe, the immediate priority is to stop the flow of water to prevent further damage.
First, find your main water shut-off valve and turn it off. This is usually located in your basement, crawl space, or near where the water line enters your home. Once the water is off, drain the system by opening all the faucets in your house.
This will help remove any remaining water from the pipes.
Then, clean up any standing water using buckets, towels, and a wet-dry vacuum. Open windows and use fans to help dry out the affected areas and prevent mold growth. Finally, call a plumber immediately to repair the burst pipe and assess any water damage.
Preventative Measures Before and During Cold Snaps
Being proactive is the best defense against frozen pipes. Taking a few simple steps before winter truly sets in and during periods of extreme cold can save you a lot of trouble.
These measures help ensure your home’s plumbing system can withstand the harsh winter weather.
Preparing Your Home for Winter
Before the first frost hits, take stock of your home’s vulnerability. Identify any outdoor faucets or spigots and disconnect all garden hoses.
If you have a sprinkler system, be sure to drain it completely according to the manufacturer’s instructions.
Check for any cracks or openings in your home’s exterior walls, foundation, and around vents, windows, and doors.
Seal these with caulk or weather stripping. Insulate any pipes that are exposed to cold, particularly in basements, garages, crawl spaces, and attics.Consider installing an indoor faucet on a timer that turns on a slow drip during very cold nights.
Monitoring and Action During Cold Weather
When the temperature drops significantly, it’s time to be extra vigilant. Check your thermostats to ensure your home is heated to at least 55 degrees Fahrenheit (13 degrees Celsius), even when you are away. This helps maintain a baseline temperature that can prevent pipes from freezing.
During extremely cold periods, let those faucets drip, especially those on exterior walls. Open kitchen and bathroom cabinet doors to allow warmer room air to circulate around pipes. If you plan to be away for an extended period during winter, don’t turn off your heat.
You can set your thermostat to a lower temperature, but keep it warm enough to protect your pipes.
Securing Less Used Areas
Areas of your home that are not frequently heated are often the most at risk. This includes garages, basements, guest rooms, and attics. Make sure these areas are adequately insulated.
If a garage is attached to your house and contains plumbing, ensure the garage door is kept closed as much as possible during cold weather.
Consider installing an automatic shut-off valve for your main water line if you live in an area prone to extreme cold.
These devices can detect unusual water flow, like that caused by a burst pipe, and automatically shut off the water supply. While an investment, they offer significant peace of mind.
Outdoor Protection for Faucets
Outdoor faucets are a common weak point for freezing. Ensure all hoses are disconnected and stored. If you have old-style faucets that cannot be easily drained, consider installing frost-proof sillcocks.
These are designed so that the actual valve seat is located inside the heated part of the house, preventing water from standing in the part exposed to the cold.
If you have indoor shut-off valves for your outdoor faucets, close them and then open the outdoor faucet to drain any remaining water.
Then, re-open the outdoor faucet slightly to allow any residual moisture to escape. Follow this by placing an insulated hose bib cover over the faucet.
Frequently Asked Questions Of How to Protect Pipes From Freezing in Winter
Question: What is the best way to insulate pipes?
Answer: The best way to insulate pipes is by using foam pipe insulation sleeves that are specifically designed for plumbing. For areas that are extremely cold, electric heat tape can also be a very effective option.
Question: How much does it cost to protect pipes from freezing?
Answer: The cost can vary, but simple measures like letting faucets drip or opening cabinet doors are free. Foam pipe insulation sleeves can cost a few dollars per foot, while heat tape might be more expensive.
Question: Can a frozen pipe burst even if I thaw it?
Answer: Yes, a frozen pipe can burst if the ice expansion has already caused damage. Thawing the pipe will reveal if there is a leak or burst, and you may still need repairs.
Question: What if I am going on vacation in winter?
Answer: If you are going on vacation during winter, it is crucial to keep your home heated to at least 55 degrees Fahrenheit (13 degrees Celsius). You might also consider having a trusted friend or neighbor check on your home regularly and let faucets drip.
Question: How do I know if my pipes are frozen?
Answer: You will likely notice a lack of water when you turn on a faucet. You might also hear a gurgling sound or see frost on the pipe itself.
Summary
Protecting your pipes from freezing in winter is simple with the right steps. Insulate vulnerable pipes with foam sleeves or heat tape. Keep water moving by letting faucets drip and opening cabinet doors.
Always disconnect hoses and drain outdoor faucets. If a pipe freezes, thaw it gently with warm water or a hairdryer. For any concerns, call a professional.
These actions will keep your home safe and dry all winter long.
![Home Maintenance Mistakes Cost Homeowners Yearly[1]](https://creativehouseblog.com/wp-content/uploads/2026/05/Home_Maintenance_Mistakes_Cost_Homeowners_Yearly1-1-768x403.jpg)
![Benefits Of Fresh Juice Vs Store Bought[1]](https://creativehouseblog.com/wp-content/uploads/2026/04/Benefits_Of_Fresh_Juice_Vs_Store-Bought1-1-768x448.jpg)
![What Foods Should Not Go in a Food Processor[1]](https://creativehouseblog.com/wp-content/uploads/2026/03/What_Foods_Should_Not_Go_in_a_Food_Processor1-768x448.jpg)

![9 Healthy Snacks You Can Make With A Dehydrator[1]](https://creativehouseblog.com/wp-content/uploads/2026/04/9_Healthy_Snacks_You_Can_Make_With_A_Dehydrator1-768x448.jpg)
![7 Common Pizza Oven Mistakes Beginners Make[1]](https://creativehouseblog.com/wp-content/uploads/2026/04/7_Common_Pizza_Oven_Mistakes_Beginners_Make1-768x448.jpg)