It’s that time of year again when the air gets a bit crisp, and we start thinking about staying warm inside.
One common issue many people face is drafts coming from under or around their doors. It can be a bit tricky for beginners to know exactly where to start.
But don’t worry! We’re going to walk you through how to seal those pesky gaps. It’s simpler than you think, and we’ll break it down step by step.
Get ready to make your home cozier and stop those chilly breezes.
Key Takeaways
- You will learn why sealing door gaps is important for home comfort and energy savings.
- Discover the common types of gaps that let drafts in around doors.
- Understand the different materials and tools needed for sealing door gaps.
- Get a clear, step-by-step guide on how to effectively seal gaps around your doors.
- Learn tips for checking your work and maintaining your seals.
![How to Seal Gaps Around Doors Before Cold Weather Arrives[1]](https://creativehouseblog.com/wp-content/uploads/2026/05/How_to_Seal_Gaps_Around_Doors_Before_Cold_Weather_Arrives1.jpg)
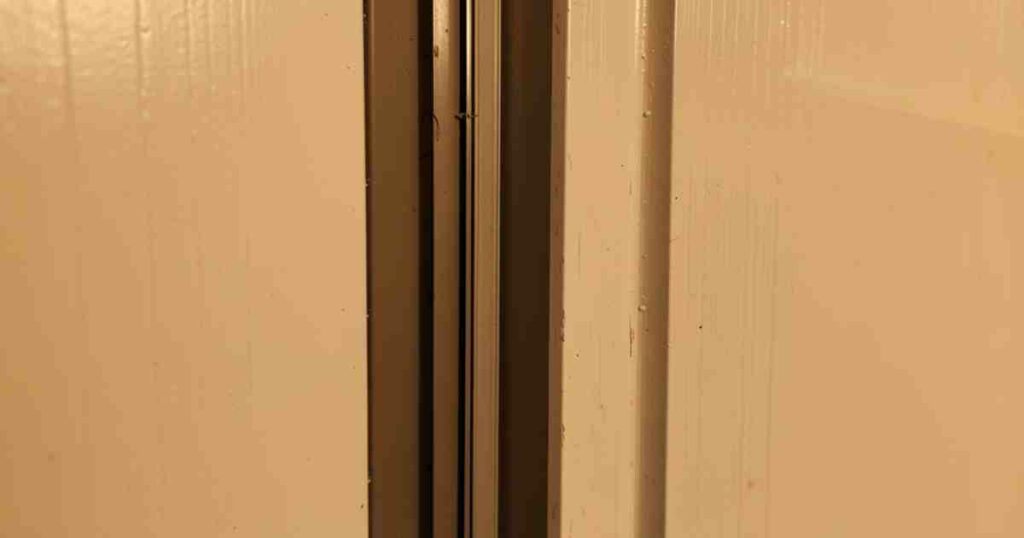
Why Sealing Door Gaps Matters Before Winter
When cold weather rolls in, the last thing you want is a chilly draft sneaking into your home. Sealing gaps around your doors is a super effective way to keep your house warm and your energy bills lower.
Think of it like putting on a warm coat; it stops the cold air from getting in and the warm air from escaping.
This simple task makes a big difference in how comfortable you feel, especially during the coldest months. It’s a smart move for any homeowner looking to save money and stay snug.
When we talk about how to seal gaps around doors before cold weather arrives, we’re focusing on a proactive step that prevents bigger problems.
Drafts don’t just make rooms feel colder; they can force your heating system to work harder, using more energy than it needs to. This means higher electricity or gas bills for you.
By taking a little time to seal up these openings, you’re essentially improving your home’s insulation without a huge renovation project.
It’s a practical and budget-friendly way to boost your home’s efficiency and comfort level before the truly cold weather hits.
Understanding Different Door Gap Types
Doors are not always a perfect seal against the frame. Over time, weather and use can cause small openings. These gaps let out warm air and let in cold air.
Knowing the different kinds of gaps helps us pick the best way to fix them.
One common type of gap is found at the very bottom of the door. This is often due to the door being slightly warped or the threshold not being perfectly even. This gap can be quite large, allowing a significant amount of air to pass through.
Another area is along the sides of the door, where the door meets the door frame. If the weatherstripping is old or damaged, it can create openings.
Sometimes, the door itself might not be perfectly aligned with the frame, creating a gap on one side but not the other.
There’s also the gap at the top of the door, though this is less common than bottom or side gaps.
This can happen if the door hinges are loose or the frame has shifted. Finally, look at the area where the door frame meets the wall.
While not directly part of the door itself, gaps here can also let in drafts. Each of these needs a slightly different approach to ensure a complete seal.
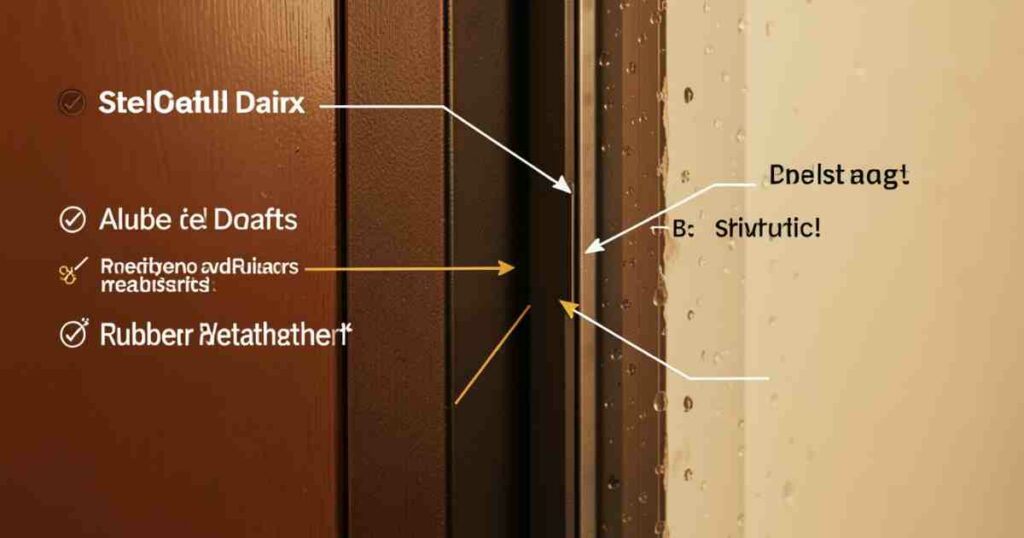
Materials You’ll Need for Sealing
To get the job done right, you’ll need a few simple supplies. Having the right tools makes the process much easier and ensures a better result. Don’t worry; most of these are easy to find at any hardware store and aren’t too expensive.
- Weatherstripping: This is the most common solution. It comes in various types like foam tape, V-strip, or tubular gaskets. Foam tape is good for small gaps, while tubular gaskets are better for larger ones.
- Door Sweeps: These attach to the bottom of the door to block drafts. Some are brush-like, while others are solid strips.
- Caulk: Useful for sealing small cracks and openings around the door frame where it meets the wall.
- Caulk Gun: You’ll need this to apply the caulk smoothly and evenly.
- Utility Knife or Scissors: For cutting weatherstripping to the right size.
- Measuring Tape: To make sure you get the right lengths of materials.
- Screwdriver: If you need to remove or reattach parts of your door or frame.
- Cleaning Supplies: A cloth and cleaner to make sure surfaces are clean for good adhesion.
Step-by-Step Guide to Sealing Door Gaps
Let's get started on sealing those drafts! This guide will take you through each step clearly. Follow along, and soon your doors will be draft-free.
Step 1 Inspect Your Doors Thoroughly
Before you buy anything, take a close look at all your exterior doors. Open and close them several times. Feel along the edges and the bottom for any signs of air movement.
A simple trick is to close the door on a piece of paper. If you can pull the paper out easily, there’s a gap. Do this all around the door frame and the bottom.
Pay attention to any areas where you see light coming through when the door is closed. These are your main problem spots. Note down which doors have the biggest issues and where the gaps are located on each door.
This inspection will help you decide exactly what materials you need and where to apply them.
Step 2 Clean the Surfaces
Good adhesion is key for weatherstripping and door sweeps to work effectively. Before you attach anything new, make sure the areas where you’ll be working are clean and dry. Use a mild cleaner and a cloth to wipe down the door frame and the edge of the door itself.
Remove any dirt, dust, or old caulk. If there’s any loose paint, scrape it off.
Allow the surfaces to dry completely before proceeding to the next step. If you skip this part, your new seals might not stick properly, and you’ll have to do the job all over again. Clean surfaces ensure that your efforts will last through the winter.
Step 3 Apply Weatherstripping to the Frame
For gaps along the sides and top of the door, weatherstripping is your best friend. Measure the height of the door frame and cut your chosen weatherstripping to size. Most weatherstripping has an adhesive backing.
Peel off the backing slowly as you press the weatherstripping firmly onto the door frame. Make sure it’s applied so it makes contact with the door when it’s closed.
If you are using V-strip weatherstripping, apply one strip to the door stop on the frame, and then another on the other side of the frame.
This creates a V shape when the door is closed, providing a good seal. For tubular gaskets, ensure they are positioned so the tube presses against the door surface.
This type of weatherstripping often requires a bit more pressure to compress, making it effective for slightly larger gaps.
Step 4 Install a Door Sweep
If you found a gap at the bottom of your door, a door sweep is the solution. Measure the width of your door and cut the door sweep to that length. Most door sweeps attach with screws.
You might need to pre-drill small pilot holes in the bottom of the door to make screwing easier.
Align the door sweep so that it sits flush against the door and extends down to create a seal with the threshold or floor.
Some door sweeps are adjustable, allowing you to fine-tune how close they sit to the floor. The goal is to have it almost touching the surface without dragging. This way, it effectively blocks drafts but doesn’t make the door hard to open or close.
Brush-style door sweeps can be good for uneven surfaces, as the bristles can conform to slight imperfections.
Step 5 Seal Any Remaining Frame Gaps with Caulk
Sometimes, even after applying weatherstripping, there might be small gaps where the door frame meets the wall. These are perfect for caulk. Load your caulk gun with a bead of exterior-grade caulk.
Apply a thin, even bead of caulk into any visible cracks or gaps around the entire door frame. Smooth the caulk with your finger or a damp cloth for a clean finish.
Caulk is excellent for filling tiny spaces that weatherstripping can’t reach. It creates a solid barrier against drafts and also helps prevent water from seeping into these gaps. Make sure to use a caulk that is paintable if you plan to touch up the paint afterwards.
This step truly seals the deal, ensuring no air can sneak in or out.
Step 6 Test Your Work
Once everything is installed and the caulk has dried (check the caulk manufacturer’s instructions for drying time), it’s time to test your efforts.
Close the door and check for drafts again. You can use the paper test once more to confirm that the seal is now tight.
On a windy day, you should notice a significant difference.
Open and close the door a few times to ensure the weatherstripping and door sweep are not hindering its movement. If the door is a bit stiff, you might need to make slight adjustments.
For example, you might need to reposition the door sweep slightly or trim a bit of the weatherstripping if it’s too thick.
Maintaining Your Door Seals
Once your doors are sealed, it's important to keep them that way. Regular checks will ensure your home stays warm and energy efficient all winter long.
- Annual Inspection: Before winter arrives each year, do a quick check of your weatherstripping and door sweeps. Look for any signs of wear and tear, such as cracks, tears, or areas where the adhesive has started to peel.
- Clean Gently: When cleaning your doors and frames, be gentle around the weatherstripping. Harsh chemicals or vigorous scrubbing can damage it. A damp cloth is usually all you need.
- Check for Damage: If you notice any damage, such as a tear in the weatherstripping or a loose door sweep, repair or replace it promptly. Small problems can quickly become bigger issues if left unattended.
- Seasonal Adjustments: Depending on the type of weatherstripping you have, you might need to make minor adjustments as the seasons change. For instance, some materials can expand or contract with temperature fluctuations.
Taking a few minutes each year to maintain your seals will save you time and money in the long run. It ensures your home remains a comfortable sanctuary, no matter how cold it gets outside.
Benefits of Sealing Door Gaps
Taking the time to seal gaps around your doors offers a lot more than just a draft-free room. The advantages are significant and impact your comfort, your wallet, and even the lifespan of your home.
The most immediate benefit is improved comfort. No one enjoys feeling a cold breeze when they’re trying to relax.
By sealing these leaks, you create a more consistently warm and pleasant indoor environment.
This also means your heating system doesn’t have to work overtime to compensate for the heat loss. That directly translates into lower energy bills, which is a welcome relief for any household budget.
Beyond comfort and savings, sealing drafts can also help reduce moisture problems. Gaps can allow humid air to enter your home, leading to condensation on windows and walls. Over time, this can contribute to mold and mildew growth.
A well-sealed home is a healthier home. Furthermore, sealing gaps can help keep out unwanted pests like insects and rodents that might otherwise find their way inside through these openings.
Energy Efficiency and Cost Savings
When cold air seeps into your home, your furnace or heating system has to work harder to maintain a comfortable temperature.
This extra effort consumes more energy, leading to higher utility bills. Sealing these drafts directly combats this by preventing heat loss and keeping conditioned air inside.
It’s like adding an extra layer of insulation, but much simpler and cheaper.
Studies have shown that air leaks can account for a significant portion of a home’s energy loss.
For example, the U.S. Department of Energy suggests that air leaks can be responsible for 25-30% of a home’s heating and cooling costs.
By addressing these leaks, particularly around doors, homeowners can see noticeable reductions in their energy consumption. This not only saves money but also reduces your home’s environmental footprint.
Real-Life Example: The Henderson Family’s Savings
The Henderson family noticed their heating bills climbing dramatically each winter. Their old farmhouse had a noticeable draft from the front door. After deciding to tackle how to seal gaps around doors before cold weather arrives, they installed a good quality door sweep and replaced the worn-out weatherstripping around the frame.
The difference was almost immediate. They reported feeling a significant reduction in cold air entering their home.
After the first winter following their DIY sealing project, the Hendersons saw their heating costs drop by nearly 15%. They were amazed at how such a simple, inexpensive fix could yield such substantial savings.
They also mentioned that their living room felt much warmer, and they no longer needed to keep a blanket on the couch to ward off the chill from the door.
Improved Home Comfort and Indoor Air Quality
A home filled with drafts is rarely a comfortable home. The constant flow of cold air can make certain rooms feel significantly colder than others, leading to uneven heating. Sealing these gaps creates a more consistent and pleasant temperature throughout your living space.
This means fewer arguments about the thermostat and more consistent coziness for everyone.
Beyond just temperature, sealing gaps also improves indoor air quality. Drafts can carry in dust, pollen, and other allergens from the outside. By blocking these entry points, you help to keep your indoor air cleaner and healthier.
This is particularly beneficial for individuals with allergies or respiratory sensitivities. A well-sealed home contributes to a healthier environment for all occupants.
Scenario: A Family’s Cozy Living Room
Imagine a family with young children. The living room, where they spend most of their evenings, always felt chilly because of a drafty back door. The children often complained about feeling cold, even with the heat on.
After sealing the gaps around the back door with new weatherstripping and a door sweep, the room transformed. The constant cold air disappeared, and the room felt genuinely warm and inviting.
The children could now play comfortably on the floor without being near a cold draft. The parents noticed they didn’t have to keep adjusting the thermostat as much, and the overall ambiance of the room improved significantly. This simple fix made their family time much more enjoyable during the colder months.
Protection Against Pests and Moisture
Small openings around doors can serve as highways for unwanted guests. Insects, spiders, and even small rodents can easily find their way into your home through these tiny gaps. Sealing them effectively acts as a physical barrier, making it much harder for pests to enter your living space.
Furthermore, these gaps can allow moisture to enter your home, especially during rainy or humid weather.
This moisture can lead to problems like mold, mildew, and wood rot. Over time, persistent moisture issues can cause structural damage to your home and create unhealthy living conditions.
Sealing these entry points helps to keep your home dry and protected from these damaging elements.
Statistic: The Impact of Air Leaks on Pest Entry
A survey conducted by home inspection experts found that over 60% of homes with noticeable drafts also reported issues with insect or rodent problems, particularly around doors and windows.
This suggests a strong correlation between unsealed gaps and pest infestations. Addressing these drafts is not just about comfort; it’s a proactive measure for pest prevention.
| Area of Concern | Potential Problem | Solution |
|---|---|---|
| Bottom of Door | Drafts, Pest Entry | Door Sweep |
| Sides/Top of Door | Drafts, Heat Loss | Weatherstripping |
| Door Frame to Wall | Drafts, Moisture Entry | Caulk |
Choosing the Right Sealing Materials
With various options available, selecting the correct sealing materials ensures the best results for your specific needs.
Different types of gaps require different solutions, and the material you choose will affect the durability and effectiveness of your seal.
Consider the size of the gap first. Small, hairline cracks might only need caulk, while a larger gap at the bottom of a door will require a more substantial door sweep. The material of your door and frame also plays a role.
Some adhesives stick better to certain surfaces than others. Read product descriptions carefully to ensure compatibility.
Think about the look you want to achieve as well. Some weatherstripping and door sweeps are designed to be nearly invisible, while others are more prominent. For example, clear V-strip weatherstripping can blend in well with many door frames.
Ultimately, the best material is one that fits your gap, adheres well, and will last through the winter.

Foam Tape Weatherstripping
Foam tape is a popular choice for sealing small gaps. It’s usually self-adhesive and comes in various thicknesses and widths. Its flexibility allows it to compress easily into tight spaces, creating a decent seal against drafts.
- Best For: Small gaps and cracks, typically where the door meets the frame or where the frame meets the wall.
- Pros: Easy to install, inexpensive, conforms well to irregular surfaces.
- Cons: Can degrade over time, especially in direct sunlight or extreme temperatures; may not be durable enough for larger gaps or high-traffic doors.
When applying foam tape, ensure the surface is clean and dry. Press the tape firmly onto the surface, and if the gap is slightly larger, you might need to overlap the pieces.
For a more robust seal, you can double up on the foam tape, but be cautious not to make the door too difficult to close.
Tubular Gasket Weatherstripping
Tubular gasket weatherstripping features a hollow tube, often made of rubber or vinyl, that provides a more substantial seal.
This type is excellent for moderate to larger gaps, as the tube compresses to fill the space. It’s often attached by sandwiching it between the door and the frame.
- Best For: Moderate gaps along the sides and top of the door, especially where the door may not sit perfectly square in the frame.
- Pros: Provides a strong, flexible seal; durable and can withstand more compression than foam tape.
- Cons: Can be slightly more challenging to install than foam tape; may require more precise placement to ensure proper compression.
Installation typically involves cutting the gasket to length and then attaching it to the door frame so that the tube presses firmly against the door when it’s closed.
Some types are designed to be slid into a pre-cut groove in the frame, offering a very secure fit.
V-Strip Weatherstripping
V-strip, also known as spring bronze or rigid vinyl, is a durable option that creates a tight seal by pressing inward.
It’s often applied to the door stop—the part of the frame that the door closes against. When the door is closed, the V-shaped material presses firmly against the door’s edge.
- Best For: Moderate gaps and for doors that need a long-lasting, sturdy seal.
- Pros: Very durable, provides an excellent seal, long-lasting.
- Cons: Can be trickier to install, especially the metal versions; might require small nails or staples.
This type of weatherstripping is effective because it has a spring-like action. When the door is opened, the V-strip flexes away, allowing the door to move freely. When closed, it springs back to create a tight seal.
It’s a good choice for doors that are frequently used.
Door Sweeps
Door sweeps are specifically designed to seal the gap at the bottom of the door. They come in various styles, including brush seals, vinyl strips, and solid rubber. The best choice depends on the type of flooring and the size of the gap.
- Best For: Sealing the gap between the bottom of the door and the threshold or floor.
- Pros: Highly effective for bottom drafts, available in many styles to match different needs, can help keep out debris and even light.
- Cons: May require drilling into the door, can wear out over time, some styles might not work well with very uneven floors.
Brush sweeps are good for uneven surfaces because the bristles can conform to the floor. Vinyl or rubber sweeps create a more solid barrier and are best for smooth, level thresholds.
Ensure you choose a sweep that’s the correct length for your door to get the best seal without impeding door operation.
Caulk and Sealants
Caulk is a versatile sealant used to fill small cracks and gaps around the door frame where it meets the wall or trim. It’s a flexible material that dries to form a waterproof and airtight barrier.
- Best For: Filling small cracks and gaps around the exterior of the door frame, where the frame meets the siding or brick.
- Pros: Excellent for tiny gaps, creates a smooth finish, readily available and inexpensive.
- Cons: Not suitable for large moving gaps; requires a caulk gun for application; can dry out and crack over time if not properly maintained.
When using caulk, choose an exterior-grade product that is designed to be weather-resistant and paintable.
Apply a steady bead of caulk into the gap, and then use a wet finger or a putty knife to smooth it out for a clean, finished look.
This step is crucial for a complete seal, as it addresses any remaining air leaks that weatherstripping might miss.
Comparing Sealing Methods
Each sealing method has its strengths and weaknesses. Choosing the right combination ensures you get the best seal for your door. Here’s a quick comparison to help you decide.
| Method | Best For | Ease of Installation | Durability | Cost |
|---|---|---|---|---|
| Foam Tape | Small Gaps | Very Easy | Moderate | Low |
| Tubular Gasket | Moderate Gaps | Moderate | High | Moderate |
| V-Strip | Moderate to Large Gaps | Moderate to Difficult | Very High | Moderate |
| Door Sweep | Bottom Gaps | Moderate | High | Moderate |
| Caulk | Tiny Cracks | Easy | Moderate | Low |
For most exterior doors, a combination of methods works best. For example, you might use tubular gasket weatherstripping on the sides and top, a door sweep at the bottom, and caulk to seal any small gaps around the frame where it meets the wall. This layered approach ensures comprehensive coverage and a truly draft-free door.
When to Call a Professional
While sealing door gaps is generally a DIY-friendly task, there are times when calling a professional might be the better option.
If you have very old doors, significant structural issues with your frame, or if you’ve tried sealing them yourself and are still experiencing drafts, it might be time to get expert help.
Professionals have the experience and specialized tools to diagnose and fix complex issues.
They can identify problems you might miss, such as warped frames or improperly installed doors, and provide solutions that are both effective and long-lasting.
Sometimes, a professional assessment can save you time and money in the long run by ensuring the job is done right the first time.
Frequently Asked Questions Of How to Seal Gaps Around Doors Before Cold Weather Arrives
Question: How often should I check my door seals
Answer: It’s a good idea to check your door seals at least once a year, ideally in the early fall before the cold weather sets in.
Question: Can I seal gaps on interior doors
Answer: Yes, you can seal gaps on interior doors to improve comfort and reduce noise, although the need is usually less urgent than for exterior doors.
Question: What is the best type of weatherstripping for very old wooden doors
Answer: For old wooden doors, consider flexible foam tape or tubular gasket weatherstripping as they conform well to slightly uneven surfaces.
Question: Will sealing door gaps affect how my door opens
Answer: If done correctly, sealing gaps should not significantly affect how your door opens. However, it’s important to test the door’s operation after installation and make minor adjustments if needed.
Question: Can I use spray foam insulation for door gaps
Answer: Expanding spray foam is generally not recommended for sealing door gaps as it can be difficult to control, may warp door frames, and can make future repairs challenging.
Wrap Up
You now have a clear path on how to seal gaps around doors before cold weather arrives.
By taking these simple steps, you ensure a warmer, more energy-efficient home. Focus on identifying gaps, cleaning surfaces, and using the right materials like weatherstripping, door sweeps, and caulk.
Your efforts will lead to noticeable savings and a cozier living space all winter long.
![Espresso Versus Regular Coffee What Is The Difference[1]](https://creativehouseblog.com/wp-content/uploads/2026/03/Espresso_Versus_Regular_Coffee_What_Is_The_Difference1-768x448.jpg)
![Extension Lead Safety Mistakes People Make at Home[1]](https://creativehouseblog.com/wp-content/uploads/2026/05/Extension_Lead_Safety_Mistakes_People_Make_at_Home1-768x403.jpg)
![Easy Habit Hacks For A Tidy Home[1]](https://creativehouseblog.com/wp-content/uploads/2026/05/Easy_Habit_Hacks_For_A_Tidy_Home1-768x403.jpg)
![Spring Home Maintenance Checklist to Start the Year Right[1]](https://creativehouseblog.com/wp-content/uploads/2026/05/Spring_Home_Maintenance_Checklist_to_Start_the_Year_Right1-768x403.jpg)
![10 Foods You Should Never Store In A Freezer[1]](https://creativehouseblog.com/wp-content/uploads/2026/04/10_Foods_You_Should_Never_Store_In_A_Freezer1-768x448.jpg)
![6 Reasons Your Food Slicer Isn’T Cutting Properly[1]](https://creativehouseblog.com/wp-content/uploads/2026/04/6_Reasons_Your_Food_Slicer_IsnT_Cutting_Properly1-768x448.jpg)