Making a tasty sandwich at home should be simple, right? But sometimes, even with a sandwich maker, things can go a bit wrong. Many people run into the same little problems when they’re starting out.
Maybe the bread gets stuck, or the cheese melts everywhere but inside. Don’t worry, though! We’ll walk through 7 Common Sandwich Maker Mistakes to Avoid one by one.
Soon, you’ll be making perfect grilled sandwiches every time. Get ready to learn how to make your sandwich maker work its best for you.
Key Takeaways
- Using the wrong type of bread can lead to messy results.
- Overfilling your sandwich causes ingredients to spill out.
- Not preheating your sandwich maker results in soggy bread.
- Cleaning your sandwich maker properly prevents future sticking.
- Ignoring the power cord can be a safety hazard.
- Cutting your sandwich before it cools can make it fall apart.

Understanding Your Sandwich Maker
A sandwich maker is a great kitchen helper. It’s designed to toast bread and melt cheese quickly. This means you can get a warm, gooey sandwich in just a few minutes.
For beginners, it seems straightforward. You put bread and fillings inside and close the lid. But there are a few common pitfalls that can stop you from getting that perfect golden-brown, cheesy delight.
Let’s look at some of these 7 Common Sandwich Maker Mistakes to Avoid so you can make delicious sandwiches with ease.

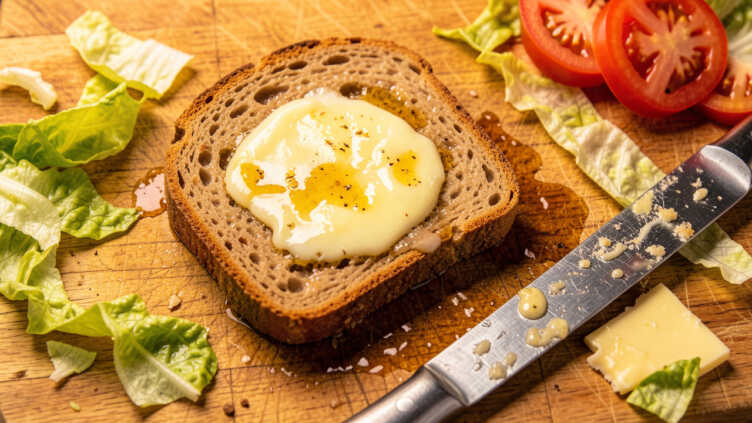
Mistake 1: Choosing the Wrong Bread
Why it happens
Bread choice is super important for a good sandwich. Some breads are too soft and fall apart when you close the lid. Others are too thick and don’t toast evenly.
If the bread is too delicate, it might get mashed. If it’s too sturdy, the sandwich maker might not seal properly.
What to do instead
Stick with medium-thickness breads. Sourdough, white bread, or whole wheat bread work well. These hold their shape and toast up nicely.
Avoid very airy or very dense breads for best results. The bread should be just right to get crispy on the outside and soft inside.
Mistake 2: Overstuffing Your Sandwich
Why it happens
It’s tempting to load up your sandwich with tons of delicious fillings. More cheese, more meat, more veggies! But when you put too much inside, it has nowhere to go when the sandwich maker closes.
This leads to fillings oozing out the sides. It makes a mess and can burn onto your sandwich maker, making it hard to clean.
What to do instead
Be sensible with your fillings. Use just enough to make a satisfying sandwich. A single layer of meat or cheese is often enough.
If you want more, try to keep the fillings somewhat flat. Don’t let them pile up too high in the middle. A little restraint now means a cleaner cooking surface and a neater sandwich later.
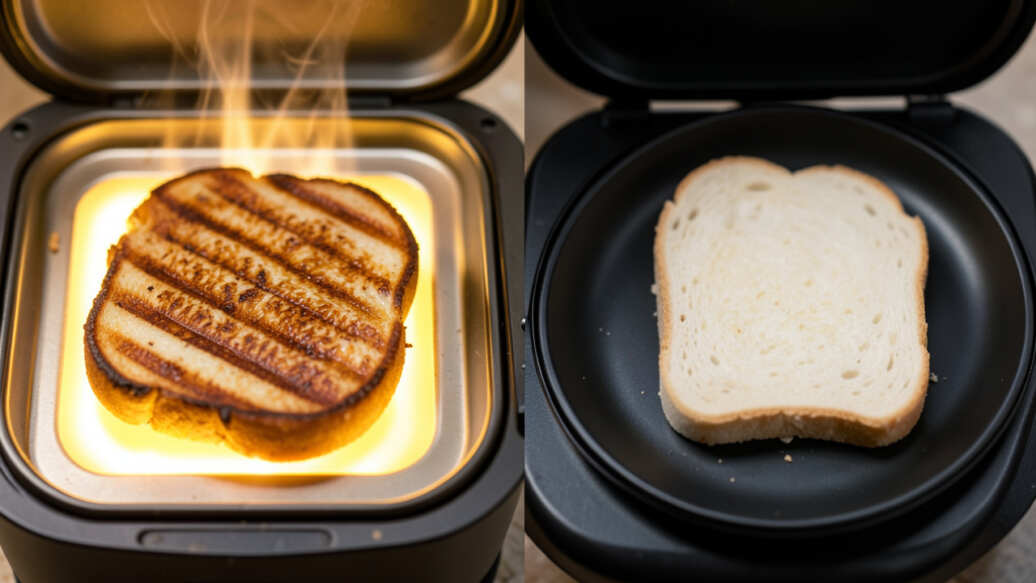
Mistake 3: Not Preheating Your Sandwich Maker
Why it happens
Many people are eager to start making their sandwich. They put the bread and fillings in and then turn the machine on. This might seem faster, but it’s a mistake.
The sandwich maker needs time to get hot. If it’s not hot enough, your bread will steam rather than toast. This leads to a soggy, pale sandwich instead of a crispy, golden one.
What to do instead
Always let your sandwich maker preheat. Most have an indicator light that tells you when it’s ready. This usually takes 3-5 minutes.
A hot machine will give you that perfect crisp exterior and melt your cheese beautifully. Patience here is key to a great sandwich.
Mistake 4: Using Too Much Butter or Oil
Why it happens
Butter or oil on the outside of the bread helps it get golden and crispy. But if you use too much, it can make a greasy mess. Excess oil can seep into the sandwich maker’s parts.
It also makes your sandwich greasier than you might want. Sometimes, people even put butter on the inside, which isn’t needed.
What to do instead
Use a light brush of butter or cooking spray on the outside of the bread. Just a thin coat is all you need. This helps prevent sticking and gives a nice crunch.
You don’t need to butter the inside of the sandwich. The cheese will melt and help hold everything together.
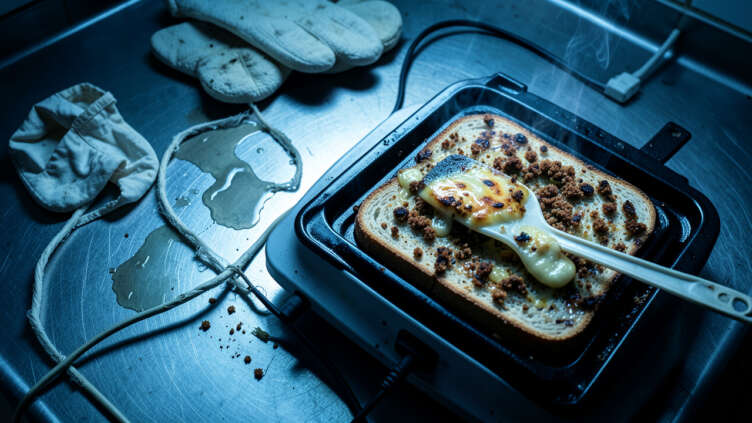
Mistake 5: Not Cleaning It Properly After Use
Why it happens
After enjoying your delicious sandwich, it’s easy to forget about cleaning. Cheese drips, breadcrumbs, and bits of filling can get stuck. If you don’t clean these right away, they can harden.
This makes them very difficult to remove later. Burnt-on food can also affect how your sandwich maker cooks the next time.
What to do instead
Clean your sandwich maker while it’s still a little warm, but unplugged. Use a damp cloth or a soft sponge. For stubborn bits, a plastic spatula can help.
Many sandwich makers have non-stick surfaces, so harsh scrubbing isn’t usually needed. Regular cleaning keeps it working well and your sandwiches tasting fresh.
Mistake 6: Forgetting About Safety
Why it happens
Sandwich makers get hot. People sometimes forget this. Leaving the power cord lying around where it can be tripped over is a hazard.
Also, touching the hot plates or exterior without caution can cause burns. Children or pets might also get too close to a hot appliance.
What to do instead
Always be aware of the hot surfaces. Let the sandwich maker cool down completely before storing it. Keep the power cord tidy, perhaps wrapped around the base if designed to do so.
Make sure it’s in a safe place away from pets and small children when in use or cooling. Safety first ensures you can enjoy your food without any accidents.

Mistake 7: Cutting Your Sandwich Too Soon
Why it happens
You’ve made a perfect sandwich, hot and steamy. Your first instinct might be to grab a knife and cut it right in half. However, the cheese inside is very hot and molten.
Cutting it too early lets the hot cheese and fillings ooze out. It can also make the sandwich structure a bit messy and less stable.
What to do instead
Let your sandwich sit for a minute or two after you take it out of the maker. This allows the cheese to set up just a little. Then, when you cut it, the fillings will stay nicely in place.
You’ll get clean halves and a much neater eating experience. This simple step makes a big difference.
Frequently Asked Questions
Question: What kind of bread is best for a sandwich maker?
Answer: Medium-thickness breads like sourdough, white bread, or whole wheat bread work very well. They toast nicely and hold their shape.
Question: Can I put cheese on both sides of the bread?
Answer: Yes, you can put cheese on both slices of bread if you like. Just make sure you don’t overfill the sandwich overall.
Question: How do I get cheese to melt without leaking out?
Answer: Try not to overstuff your sandwich. Also, letting it rest for a minute after cooking helps the cheese set slightly before cutting.
Question: My sandwich maker is sticking. What should I do?
Answer: Make sure you are cleaning it properly after each use. Using a little butter or oil on the outside of the bread also helps prevent sticking.
Question: How long does it take for a sandwich maker to preheat?
Answer: Most sandwich makers take about 3 to 5 minutes to preheat. Look for an indicator light that shows when it’s ready.
Final Thoughts
Avoiding these 7 Common Sandwich Maker Mistakes to Avoid is simple. Use the right bread, don’t overfill, and always preheat your machine. Clean it up after you’re done.
Be safe around the hot surfaces. Let your sandwich rest a moment before cutting. By following these easy tips, you’ll make delicious, perfectly cooked sandwiches every single time.
Enjoy your tasty creations!
![8 Tips For Perfect Homemade Bread Every Time[1]](https://creativehouseblog.com/wp-content/uploads/2026/04/8_Tips_For_Perfect_Homemade_Bread_Every_Time1-768x448.jpg)
![6 Reasons Your Garbage Disposal Is Smelling Bad[1]](https://creativehouseblog.com/wp-content/uploads/2026/04/6_Reasons_Your_Garbage_Disposal_Is_Smelling_Bad1-768x448.jpg)
![Why Some Air Fryers Smoke Explained[1]](https://creativehouseblog.com/wp-content/uploads/2026/03/Why_Some_Air_Fryers_Smoke_Explained1-768x448.jpg)
![8 Benefits Of Cooking With A Steam Oven[1]](https://creativehouseblog.com/wp-content/uploads/2026/04/8_Benefits_Of_Cooking_With_A_Steam_Oven1-768x448.jpg)
![9 Things You Should Know Before Using A Pizza Oven At Home[1]](https://creativehouseblog.com/wp-content/uploads/2026/04/9_Things_You_Should_Know_Before_Using_A_Pizza_Oven_At_Home1-768x448.jpg)
![7 Juicing Mistakes That Waste Ingredients[1]](https://creativehouseblog.com/wp-content/uploads/2026/04/7_Juicing_Mistakes_That_Waste_Ingredients1-768x448.jpg)