Winter is coming, and the thought of a drafty house can make anyone shiver. Many people find checking for cold air leaks a bit tricky when they first try. They worry about missing something important or not knowing where to look.
But don’t worry, it’s much simpler than it sounds! This guide will walk you through how to check your home for cold air leaks before winter with easy steps. We’ll show you exactly what to do so your home stays warm and cozy.
Key Takeaways
- You will learn simple methods to detect hidden drafts around your house.
- Discover common areas where cold air tends to sneak in.
- Understand how to use everyday items to find air leaks.
- Get practical tips to make your home more energy efficient for winter.
- Feel confident in preparing your home against winter’s chill.
![How to Find Cold Air Leaks Before Winter Arrives[1]](https://creativehouseblog.com/wp-content/uploads/2026/05/How_to_Find_Cold_Air_Leaks_Before_Winter_Arrives1.jpg)
Finding Drafts Around Windows and Doors
Windows and doors are common places where warm air escapes and cold air enters your home.
Over time, seals can wear out, or gaps can form, especially around older frames. Identifying these leaks is a crucial first step in keeping your home snug.
This section will guide you through simple tests you can do yourself to pinpoint these weak spots before the temperature drops significantly.
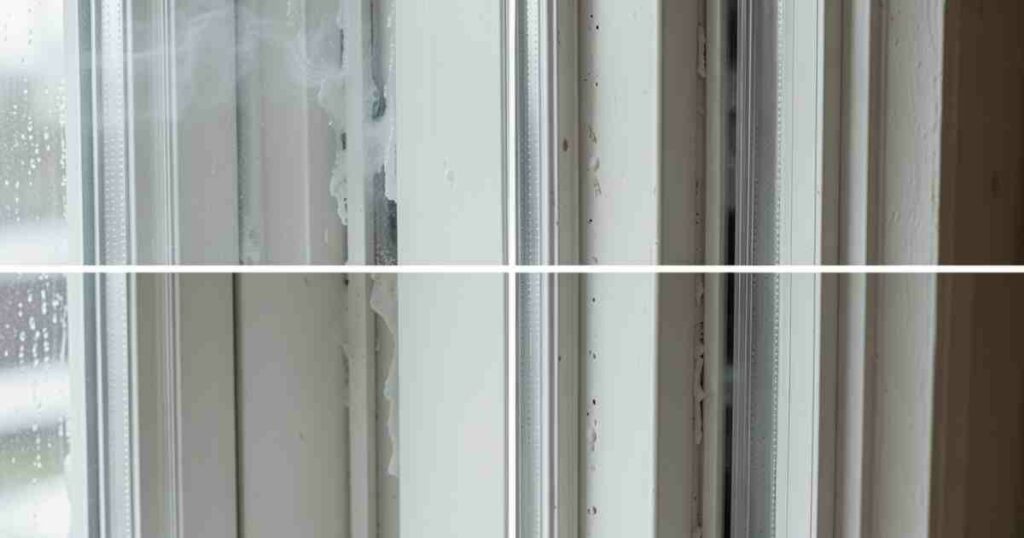
Checking Window Seals
Look closely at the edges of your window frames. You might see small gaps or cracks where the frame meets the wall. These are prime spots for drafts.
Inspect the caulk around your windows. Caulk is a sealant that fills small gaps. If it looks cracked, peeling, or missing, it needs to be replaced. Old caulk can let a lot of cold air in.
Check the weatherstripping on your doors. Weatherstripping is a flexible material that seals the gap between the door and its frame when closed. If it’s worn, torn, or flattened, it won’t seal properly.
Feel for drafts when the wind blows. On a breezy day, stand near your windows and doors and feel for any cool air coming in. This is a direct sign of a leak.
A good example of a common issue is the bottom of a poorly fitted door. You might see light coming through when the door is shut, which means air is also coming through. Replacing worn weatherstripping on a front door can make a noticeable difference in comfort and heating bills.
Testing Door Frames
Doors, especially exterior ones, are frequently used and can develop leaks over time. The constant opening and closing can loosen seals or warp the door itself.
Look for gaps between the door and the frame. When the door is closed, check if there is any visible space. You can often see light through these gaps.
- Test the threshold. The threshold is the strip at the bottom of the door. If it’s not sealing tightly against the door, cold air can easily enter.
- Examine the hinges. Sometimes, loose hinges can cause a door to sag, creating a gap at the top or side.
Imagine a scenario where a family notices their living room is always colder than the rest of the house.
After checking, they find a significant gap at the bottom of their patio door, letting in a constant stream of cold air. By adding new weatherstripping and adjusting the threshold, they made the room much warmer.
Inspecting Other Common Leak Spots
Beyond windows and doors, many other parts of your home can hide air leaks. These include electrical outlets, light fixtures, plumbing penetrations, and attic hatches.
Addressing these less obvious areas is just as important for creating an energy-efficient home.

Electrical Outlets and Light Switches
The small gaps around electrical outlets and light switches on exterior walls can be surprising sources of drafts.
- Feel for drafts. Place your hand near the cover plates of outlets and switches on walls that face the outside. You might feel a cool breeze.
- Use an incense stick or smoke pencil. Light an incense stick and hold it near the outlet or switch. If the smoke bends or is pulled towards the opening, there’s an air leak.
- Check for loose covers. The screws holding the cover plates might be loose, creating a larger gap.
One homeowner discovered that many of their upstairs bedrooms felt drafty. They realized that the light switches and electrical outlets on the exterior walls were allowing cold air to seep in. By adding foam gaskets behind the cover plates, they significantly reduced the drafts in those rooms.
Attic Hatches and Vents
The attic is a major pathway for air to move in and out of your home. The hatch itself and any vents need to be properly sealed.
- Examine the attic hatch seal. Like a door, the attic hatch should have weatherstripping to create a tight seal when closed. Check if this is worn or missing.
- Inspect attic insulation. Ensure that insulation in the attic goes all the way to the edges of the attic floor, covering any gaps that might lead into the living space below.
- Look at vent openings. Any vents that pass through the attic into the living space, like for plumbing or dryer vents, need to be sealed where they enter the attic.
Attics can lose a lot of heat, and a poorly sealed attic hatch is a big culprit. If you can feel a draft coming from your attic entrance, it’s a clear sign that warm air is escaping.
Where Pipes and Wires Enter Your Home
Wherever pipes, wires, or cables enter your house from the outside, there’s a potential for air leaks. This includes plumbing, electrical conduits, and cable lines.
- Check around plumbing penetrations. Look at the spots where water pipes or drain pipes enter your home, especially in basements or crawl spaces.
- Inspect cable and wire entry points. Any place where television cables, phone lines, or internet cables come into the house should be sealed.
- Pay attention to dryer vents. The opening for your dryer vent on the exterior of your house needs to be well-sealed.
A study by Energy Star found that air leaks can account for up to 30% of a home’s energy costs.
Sealing these small openings contributes significantly to energy savings. For example, a leaky dryer vent can let in cold air and also allow moisture to enter your home.
Simple Methods to Detect Air Leaks
You don’t need fancy tools to find cold air leaks. Simple household items can help you pinpoint drafts effectively. These methods are easy to use and can be done by anyone in the family.
The Tissue Test
This is one of the easiest ways to detect drafts. It uses a light piece of tissue to show you where the air is moving.
- Get a thin piece of tissue or a light feather. Hold it near areas where you suspect a leak, like around window frames or door edges.
- Observe the tissue’s movement. If the tissue flutters or is pulled in a particular direction, you’ve found a draft. The stronger the movement, the bigger the leak.
- Test systematically. Go around all your windows, doors, and any other potential leak points, testing each one.
The tissue test is particularly effective on a windy day. The natural movement of the air outside will exaggerate any small leaks, making them easy to spot.
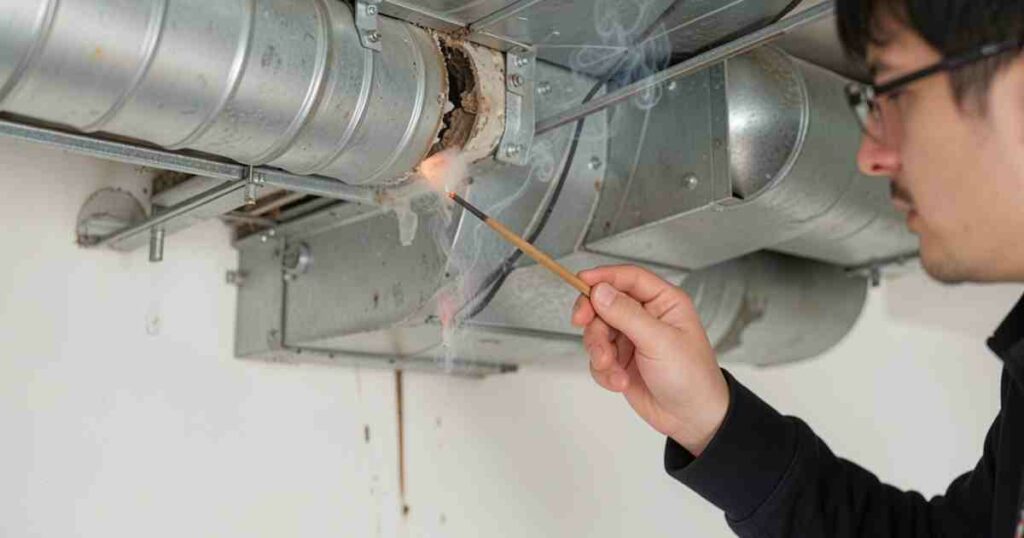
The Smoke Test
A slightly more advanced but still simple method is the smoke test. This uses a bit of smoke to visualize airflow.
- Use an incense stick or a smoke pencil. Light the incense stick and blow out the flame, or use a commercially available smoke pencil designed for this purpose.
- Carefully waft the smoke. Gently blow the smoke towards the area you suspect has a leak.
- Watch the smoke’s direction. If the smoke is drawn into a gap or blows away from the area, you’ve found an air leak. This method is great for finding smaller, harder-to-see drafts.
A practical scenario: You might notice a draft around a fireplace. Using a smoke pencil, you can see smoke being pulled into tiny cracks around the damper or the framing, showing exactly where to seal.
Using Your Hand or a Light Cloth
Sometimes, just using your senses is enough. Your skin is sensitive to temperature changes.
- Run your hand along edges. Carefully run your bare hand along the edges of windows, doors, and any openings. You can often feel a subtle change in temperature if there’s a draft.
- Feel for air movement. Try to feel for any movement of air, even if it’s very slight. A draft might feel like a cool whisper against your skin.
- Use a dry, light cloth. You can also hold a dry, light cloth near potential leak spots. It will flutter if there’s airflow.
This simple touch method is quick and requires no special equipment. It’s a great way to do a preliminary check before using more precise methods.
Sealing Common Air Leaks
Once you’ve found the leaks, the next step is to seal them. Fortunately, most common air leaks can be fixed with inexpensive materials and a little effort.
Caulking and Weatherstripping
These are your primary tools for sealing gaps.
- Apply caulk to cracks and gaps. Use a caulk gun to apply sealant around window and door frames, and any other small cracks where air can escape. Smooth the bead of caulk for a clean finish.
- Install or replace weatherstripping. For doors and operable windows, new weatherstripping can create a tight seal. There are many types available, from foam tape to rubber seals.
- Choose the right caulk. For exterior use, choose a caulk designed for outdoor conditions, which is durable and weather-resistant. For interior gaps, latex caulk is usually sufficient.
Using caulk is essential for sealing stationary gaps. For a leaky window frame, a continuous bead of caulk around the outside and inside edges of the trim can stop drafts effectively.
Foam Gaskets and Sealants
For larger gaps or holes, expanding foam sealant can be very effective. Foam gaskets are ideal for electrical outlets.
- Install foam gaskets for outlets and switches. These inexpensive foam inserts fit behind the cover plate and block airflow. They are one of the easiest and most cost-effective ways to stop drafts from these sources.
- Use expanding foam for bigger gaps. For larger openings, like around pipes entering the house or in basements, use a can of spray foam sealant. Be careful not to use too much, as it expands significantly.
- Seal around vents and pipes. Any place where a pipe or vent passes through a wall or floor can be sealed with caulk or foam, depending on the size of the opening.
A common scenario involves sealing around a water pipe that enters the basement. A gap here can let in cold air and moisture. Applying expanding foam fills the gap completely and creates an airtight seal.
Draft Stoppers
These are simple fabric tubes filled with sand or other material that you place at the bottom of doors.
- Use draft stoppers for doors. Place these fabric tubes along the bottom of doors that tend to have drafts, especially at floor level. They physically block the air from coming under the door.
- Make your own draft stoppers. You can easily make one by sewing a long tube of fabric and filling it with rice, beans, or sand.
- Consider them a temporary fix. While effective, draft stoppers are a more immediate, less permanent solution compared to sealing the gap itself.
Many people use draft stoppers for their front and back doors during winter. They are easy to move and provide an instant barrier against drafts that can make floors feel cold.
The Benefits of a Well-Sealed Home
Taking the time to check and seal air leaks offers significant advantages. It’s not just about comfort; it’s also about saving money and improving your home’s health.
Energy Savings and Lower Bills
A home with fewer air leaks requires less energy to heat and cool. This directly translates into lower utility bills.
- Reduced heating and cooling costs. When your home is properly sealed, your furnace or air conditioner doesn’t have to work as hard to maintain a comfortable temperature. This can lead to substantial savings over the year.
- Improved insulation effectiveness. Air leaks can bypass your insulation, reducing its ability to keep your home warm in winter and cool in summer. Sealing leaks makes your insulation perform much better.
- Consistent indoor temperature. Sealing drafts helps eliminate cold spots and uneven temperatures throughout your home, making it more comfortable year-round.
According to the U.S. Department of Energy, sealing air leaks can save you between 10% and 20% on your heating and cooling bills. This is a significant amount that adds up over time.
Increased Comfort and Home Health
Beyond energy savings, a well-sealed home is a more comfortable and healthier place to live.
- Eliminates cold drafts. The most immediate benefit is the elimination of annoying and uncomfortable cold drafts that can make rooms feel chilly even when the thermostat is set high.
- Reduces dust and allergens. Air leaks can draw in outside dust, pollen, and other allergens. Sealing them helps keep your indoor air cleaner and can improve air quality.
- Prevents moisture problems. Some air leaks can allow moisture to enter your home, potentially leading to mold and mildew growth. Sealing these openings helps maintain a drier indoor environment.
Imagine a home where you no longer have to huddle under blankets in certain rooms because of cold drafts. That’s the comfort a well-sealed home provides.
Frequently Asked Questions Of How to Find Cold Air Leaks Before Winter Arrives
Question: How often should I check for air leaks
Answer: It’s a good idea to check for air leaks at least once a year, ideally before the cold weather season begins in the fall. You can also do a quick check if you notice a specific room becoming unusually cold.
Question: What is the difference between caulk and weatherstripping
Answer: Caulk is a sealant used to fill small, stationary cracks and gaps, like around window frames. Weatherstripping is a flexible material applied to moving parts like doors and operable windows to create a seal when they are closed.
Question: Can I seal air leaks myself
Answer: Yes, absolutely! Most common air leaks can be easily sealed by homeowners using simple tools and materials like caulk, weatherstripping, and foam sealant.
Question: Where are the most common places for air leaks
Answer: The most common places include around windows and doors, electrical outlets and light switches on exterior walls, attic hatches, plumbing penetrations, and where pipes and wires enter your home.
Question: How much can sealing air leaks save on my energy bills
Answer: Sealing air leaks can typically save you between 10% and 20% on your annual heating and cooling costs, depending on the number and size of the leaks in your home.
Summary
You now know how to check your home for cold air leaks before winter. Simple tests with tissues or your hands can reveal hidden drafts.
Sealing these leaks with caulk, weatherstripping, or foam gaskets will make your home more comfortable and save you money on energy bills.
![How To Unblock Drains Without Chemicals[1]](https://creativehouseblog.com/wp-content/uploads/2026/05/How_To_Unblock_Drains_Without_Chemicals1-768x403.jpg)
![7 Mistakes To Avoid When Using A Hot Plate[1]](https://creativehouseblog.com/wp-content/uploads/2026/04/7_Mistakes_To_Avoid_When_Using_A_Hot_Plate1-768x448.jpg)
![Can You Put Aluminum Foil in an Air Fryer[1]](https://creativehouseblog.com/wp-content/uploads/2026/03/Can_You_Put_Aluminum_Foil_in_an_Air_Fryer1-768x448.jpg)
![Choosing The Right Rice Cooker Size[1]](https://creativehouseblog.com/wp-content/uploads/2026/03/Choosing_The_Right_Rice_Cooker_Size1-768x448.jpg)
![Air Fryer Temperature Guide Explained Simply[1]](https://creativehouseblog.com/wp-content/uploads/2026/03/Air_Fryer_Temperature_Guide_Explained_Simply1-768x448.jpg)
![Air Fryer Power Consumption Guide Explained Simply[1]](https://creativehouseblog.com/wp-content/uploads/2026/03/Air_Fryer_Power_Consumption_Guide_Explained_Simply1-768x448.jpg)