Finding tiny water leaks in your house can feel tough. It’s like trying to find a needle in a haystack, and if you’re new to home care, it’s even trickier.
You might see a small damp spot or notice a strange smell, but you’re not sure if it’s a big problem.
The good news is, you don’t need to be a plumbing expert. We’ll walk you through simple steps to help you figure out How to Find a Slow Leak in Your Home Before It Gets Worse. Follow along, and we’ll make this easy to manage.
Key Takeaways
- You will learn common signs of slow leaks to watch for.
- We will explain easy ways to check for leaks in your pipes and fixtures.
- Discover how to use simple tools and your senses to find hidden water damage.
- Understand how to address small leaks before they cause bigger issues.
- Gain confidence in maintaining your home’s plumbing system.
![How To Spot Slow Leaks At Home Before They Grow[1]](https://creativehouseblog.com/wp-content/uploads/2026/05/How_To_Spot_Slow_Leaks_At_Home_Before_They_Grow1.jpg)
How to Find a Slow Leak in Your Home Before It Gets Worse Simple Checks
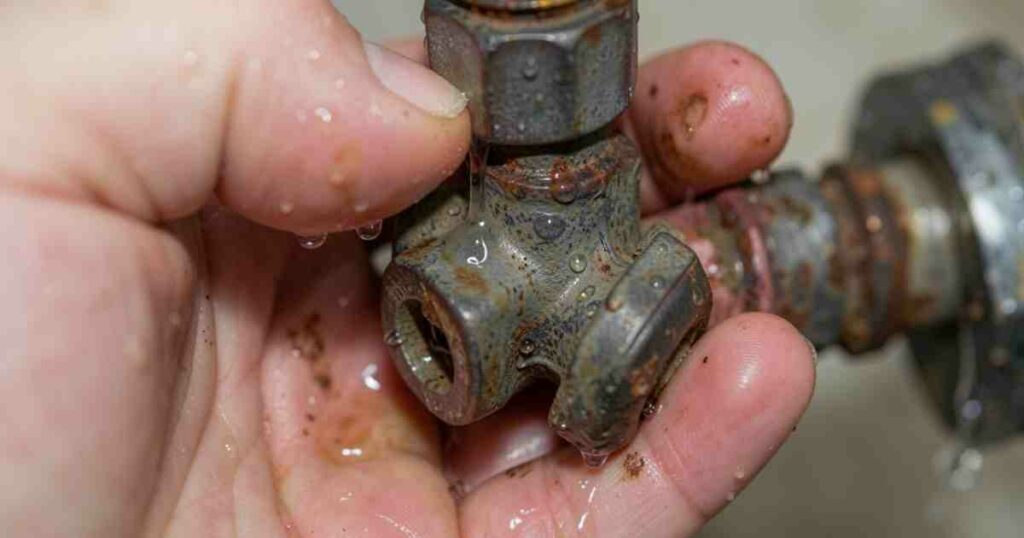
Spotting small water leaks is important for keeping your home in good shape. These leaks often start small, so you might not notice them right away. They can hide behind walls, under floors, or in quiet corners.
If left unchecked, these small leaks can cause a lot of damage over time. They can lead to mold growth, rot in wood, and even structural problems. Knowing how to find them early makes a big difference.
It saves you money on repairs and keeps your home healthy.

Checking Your Water Meter
One of the first steps to finding a slow leak is to check your home’s water meter. This device measures how much water you use. If you’re not using any water, but the meter is still moving, you likely have a leak somewhere.
It’s a simple but effective test. Make sure everyone in the house is not running any water for about an hour before you test.
Turn off all faucets, appliances that use water like washing machines and dishwashers, and any outdoor hoses.
Visit your water meter. You can usually find it outside your home, often in a box near the street or your front yard. Look for a dial or a small spinning wheel.
If this dial or wheel is moving, even slowly, while all water is off, it’s a clear sign of a leak. Some modern meters have digital displays that might show a constant flow rate or a small icon indicating usage. If you see any activity, write down the meter reading before you start the test.
Then, check it again after an hour or two.
If the meter reading has changed, a leak is present. The amount it has changed can sometimes give you an idea of how big the leak might be. A very slow, steady movement suggests a minor drip.
A faster movement means a larger leak. This test is great because it’s general; it tells you there’s a leak somewhere in your system, but not exactly where. The next steps involve narrowing down the location.
Listen for Running Water
Your ears can be surprisingly good tools for finding leaks. Sometimes, a slow leak makes a faint hissing or dripping sound. This is especially true if the leak is in a quiet area or within walls.
Walk through your home, especially near bathrooms, kitchens, laundry rooms, and basements. Turn off all other noise-making appliances. Close windows and doors to minimize outside sounds.
Then, just listen carefully for any unusual noises.
Pay close attention to areas where pipes are likely to be located. This includes behind sinks, toilets, and bathtubs. Listen near the water heater and any appliances that connect to water lines.
Sometimes, a small drip inside a toilet tank can make a soft, continuous sound of water running, even if the toilet isn't flushing.
If you hear a constant trickle or a soft hiss, try to pinpoint the area it’s coming from. This sound detection is a skill that gets better with practice.
If you hear a sound that concerns you, try to isolate it further. You might need to get close to the wall or floor. Sometimes, placing your ear directly against a surface can help amplify the sound.
If you can’t hear anything obvious, don’t worry. Many slow leaks are silent, or the sounds are too faint to notice without special equipment. This method is just one part of a thorough leak search.
Visual Clues Around Your Home
Visual signs of leaks are often the easiest to spot, but they can still be overlooked. Look for any signs of moisture or water damage in places where water shouldn’t be. This includes walls, ceilings, floors, and around any plumbing fixtures.
Even small changes can indicate a problem that needs attention. Keep an eye out for these common visual indicators that can help you find How to Find a Slow Leak in Your Home Before It Gets Worse.
Check your walls and ceilings for discoloration. Yellow or brown stains, especially near pipes, sinks, or windows, are common signs of water seeping through. You might also see peeling paint or wallpaper that is bubbling or sagging.
These are classic indicators that moisture is present behind the surface. Feel the walls and ceilings with your hands; they might feel damp or soft to the touch. This dampness is a strong clue that a leak is nearby.
Inspect your floors, too. Look for warped floorboards, soft spots, or water stains around the base of toilets, sinks, or washing machines.
If you have a basement or crawl space, check the joists and walls for any signs of water intrusion or mold growth.
Mold often appears as black, green, or white fuzzy spots and can have a musty smell. These visual clues are your home’s way of telling you it needs a check-up. Don’t ignore them.
Investigating Specific Areas for Leaks
Now that you have some general checks in place, it’s time to get more specific. Certain areas in your home are more prone to developing leaks.
By focusing your attention on these spots, you can increase your chances of finding a hidden problem.
This section will guide you through how to check common leak sites systematically.
Bathrooms and Kitchens
These are the wettest rooms in your house, making them prime spots for leaks. Start with your toilets. Check the base for any signs of moisture or water pooling.
A leak here can be from the wax seal at the bottom of the toilet or from the water tank itself. Look at the water supply line connection to the tank. Feel around it for any dampness or drips.
Also, inspect the shut-off valve. Ensure it’s not leaking.
Examine your sinks and faucets. Look under the sink for any drips coming from the pipes or the faucet connections. The U-trap, the curved pipe under the sink, can sometimes develop small leaks.
Feel around the drain and the pipe joints. Check the faucet handles and base for any water seeping out when the faucet is turned on or off.
Even a slow drip from the faucet itself, when turned off, can waste a lot of water and indicate a worn-out washer or cartridge.
Don’t forget about your shower and bathtub. Look at the grout and caulk around the tub and shower walls. Cracks or gaps can allow water to seep behind the tiles, leading to hidden leaks.
Check the showerhead connection to the wall pipe. Feel around the drain for any leaks or water damage. If you have a shower stall, inspect the base and the seals around the doors.
Any compromised seal can lead to water escaping where it shouldn’t.
Appliances and Water Heaters
Appliances that use water can develop leaks over time. Your washing machine is a common culprit. Check the water inlet hoses that connect the machine to the wall.
Look for any cracks, bulges, or damp spots on the hoses themselves or at their connections. The drain hose can also sometimes leak if it’s damaged or not properly seated.
Your dishwasher also has several water connections. Inspect the water supply line and the drain line. You might need to pull the dishwasher out slightly to get a good look at these connections behind it.
Look for water pooling on the floor around the dishwasher, which is a strong indicator of a leak. Also, check the door seal for any signs of water escaping during operation.
Water heaters are essentially large tanks holding hot water, and leaks can be serious. Check the connections at the top and bottom of the tank. Look for any rust or drips.
The pressure relief valve can also sometimes leak. If you have a tankless water heater, inspect all the connections and the unit itself for any signs of water.
Even small leaks from these appliances can lead to significant water damage and energy loss.
Basements and Crawl Spaces
These are often the forgotten areas of a home, but they are critical for leak detection. Basements and crawl spaces are where many water pipes run, and they are also susceptible to groundwater intrusion. Start by looking at the foundation walls.
Check for any cracks or damp spots. Water can seep in from the outside, especially after heavy rain. Follow any dampness back to its source, which might be an underground pipe leak.
Inspect all exposed pipes in the basement or crawl space. Look for rust, corrosion, or wet spots on the pipes themselves. Check all the joints and fittings.
These are common places for leaks to start. Pay attention to any pipes that pass through concrete walls or floors. The seals around these penetrations can fail over time.
If you have a sump pump, check its basin and the pump itself for any signs of leaks or damage.
Also, look for any areas where water might be collecting on the floor. This could indicate a leak from the foundation or from underground plumbing.
The musty smell common in basements is often a sign of persistent dampness, which could be caused by a slow, unnoticed leak.
Advanced Leak Detection Methods
Sometimes, the leaks are too small or too well-hidden for simple checks. In these cases, you might need to use more advanced methods or call in professionals. These techniques are designed to find leaks that are not obvious to the naked eye or ear.
They can save you a lot of time and potential damage.
Using Food Coloring
Food coloring can be a simple yet effective tool for checking for leaks in toilets. Toilets are a very common source of hidden water waste. A constant slow leak from the tank into the bowl can go unnoticed for a long time.
This method helps you see if the water is slowly leaking out of the tank when it shouldn’t be.
To perform this test, remove the tank lid from your toilet. Carefully add a few drops of food coloring into the toilet tank. Do not flush the toilet.
Wait for about 15 to 30 minutes. After this waiting period, check the toilet bowl. If you see colored water in the bowl, it means the water from the tank is leaking into the bowl.
This usually indicates a problem with the flapper or the fill valve in the tank. Replacing these parts is often a straightforward DIY task.
This test is great because it’s inexpensive and easy to do. It specifically targets leaks within the toilet mechanism itself.
If the colored water doesn’t appear in the bowl, your toilet tank is likely holding water properly, and the leak is not originating from this specific point.
This helps you rule out one common source of hidden water loss.
Moisture Meters
A moisture meter is a handy tool for detecting hidden dampness within building materials like walls, floors, and ceilings.
These meters have probes that you insert into the material. They measure the electrical resistance, which changes based on the moisture content.
Areas with higher moisture content will register a higher reading on the meter.
When you suspect a leak but can’t see any visible signs, a moisture meter can help you find the extent of the problem.
For instance, if you see a small water stain on a ceiling, using a moisture meter around the edges of the stain can tell you how far the moisture has spread.
This is important for determining the full scope of the damage and planning repairs.
It can also help locate leaks behind walls where no visible signs have appeared yet.
Different types of moisture meters exist, including pin and pinless models. Pin meters penetrate the surface slightly to get readings, while pinless meters measure moisture through the surface without causing damage. Both are useful for home inspectors and homeowners alike.
Using a moisture meter can prevent a small, localized leak from becoming a widespread problem by identifying the issue early.
Professional Leak Detection Services
If you’ve tried the above methods and still can’t find a leak, or if you suspect a major hidden leak, it’s time to call in the experts.
Professional leak detection services have specialized equipment and training. They can find leaks that are extremely difficult for homeowners to locate.
These professionals often use tools like acoustic listening devices that can detect the faint sound of water escaping pipes, even underground. They might also use thermal imaging cameras.
These cameras can detect temperature differences on surfaces, indicating where water is flowing behind walls or under floors.
Another advanced technique is using tracer gas, where a harmless gas is introduced into the pipes. The gas escapes at the leak point and can be detected by a special sensor.
Hiring a professional can save you money in the long run. By finding leaks quickly and accurately, they prevent extensive water damage, mold growth, and costly structural repairs.
They can also help pinpoint the exact location of the leak, making repairs more efficient and less destructive.
This is especially helpful for leaks in difficult-to-access areas.
Preventing Future Leaks
Once you’ve found and fixed a leak, it’s smart to take steps to prevent future ones. Regular maintenance is key to keeping your plumbing system in good condition. Thinking about prevention can save you a lot of trouble down the road.
Regular Plumbing Maintenance
Schedule regular check-ups for your plumbing system. This includes inspecting visible pipes for any signs of corrosion or wear. Check faucets and toilets for drips or running water.
Tighten any loose fittings. It’s also a good idea to have your water heater inspected periodically. Many issues with water heaters can lead to leaks.
Consider insulating your pipes, especially those in unheated areas like basements or crawl spaces.
This helps prevent them from freezing and bursting in cold weather. Make sure your sump pump is working correctly if you have one.
Test it regularly. Addressing small issues promptly is the best way to avoid bigger problems later.
Keep an eye on your water bill. A sudden, unexplained increase in your water bill is often the first sign of a new leak. If you notice a spike, don’t ignore it.
Perform the water meter test again to confirm if there’s a leak.
Understanding Common Leak Causes
Most leaks are caused by normal wear and tear. Pipes can corrode over time, especially older ones. Seals and gaskets can degrade.
Faucet washers can wear out. High water pressure can also put a strain on your plumbing system, leading to leaks. If your water pressure is too high, consider installing a pressure-reducing valve.
Freezing temperatures are another major cause of leaks. When water freezes in pipes, it expands, which can cause them to crack or burst. Proper insulation and letting a faucet drip during extreme cold can help prevent this.
Age is also a factor; older plumbing systems are more prone to developing leaks.
Damage from gardening or construction near water lines can also cause leaks. Tree roots can sometimes seek out water sources and damage underground pipes. Being aware of where your water lines run can help you avoid accidental damage.
| Cause | Prevention Measure |
|---|---|
| Aging Pipes | Regular inspection and eventual replacement. |
| Worn Seals and Gaskets | Inspect and replace as needed during maintenance. |
| High Water Pressure | Install a pressure-reducing valve. |
| Freezing Temperatures | Insulate pipes and let faucets drip in cold weather. |
| Accidental Damage | Know where utility lines are located. |
Frequently Asked Questions Of How To Spot Slow Leaks At Home Before They Grow
Question: How often should I check my water meter for leaks?
Answer: It’s a good idea to check your water meter for leaks at least once a month, or whenever you notice a sudden increase in your water bill.
Question: Can a small leak cause mold?
Answer: Yes, even small, slow leaks can create damp conditions that encourage mold growth over time, especially within walls and under floors.
Question: What is the most common place for a slow leak in a home?
Answer: The most common places include around toilets, under sinks, behind appliances like washing machines and dishwashers, and in shower stalls.
Question: How do I know if I have high water pressure?
Answer: You can buy a simple water pressure gauge that screws onto an outdoor faucet. Readings above 80 PSI are generally considered high.
Question: Should I fix a tiny drip myself?
Answer: Many small drips, like from a worn faucet washer, can be fixed by a DIYer. However, if you’re unsure or the leak is complex, it’s best to call a plumber.
Wrap Up
Finding slow leaks at home is easier than you think. Watch for wet spots, odd smells, and listen carefully. Checking your water meter and specific areas like bathrooms and kitchens helps.
Use simple tools like food coloring or a moisture meter if needed. Addressing leaks early saves money and stops damage. Stay aware, and your home will thank you.
![7 Meat Grinder Mistakes To Avoid[1]](https://creativehouseblog.com/wp-content/uploads/2026/04/7_Meat_Grinder_Mistakes_To_Avoid1-768x448.jpg)

![How to Prepare Your Garden Yard for Winter[1]](https://creativehouseblog.com/wp-content/uploads/2026/05/How_to_Prepare_Your_Garden_Yard_for_Winter1-768x403.jpg)
![10 Common Espresso Mistakes Beginners Make[1]](https://creativehouseblog.com/wp-content/uploads/2026/04/10_Common_Espresso_Mistakes_Beginners_Make1-768x448.jpg)

![9 Coffee Drinks You Can Make With An Espresso Machine[1]](https://creativehouseblog.com/wp-content/uploads/2026/04/9_Coffee_Drinks_You_Can_Make_With_An_Espresso_Machine1-768x448.jpg)