Roof leaks can seem like a big mystery, especially when you’re new to home care. It’s easy to miss the small signs that point to a problem.
That’s where knowing How to Spot Failing Roof Flashing Before It Causes Leaks becomes super helpful.
We’ll break it down into simple steps so you can check your roof and stop leaks before they start. You’ll learn what to look for and how to keep your home dry and safe.
Key Takeaways
- You will learn where roof flashing is located.
- You will discover common signs of damaged flashing.
- You will understand why flashing fails.
- You will get tips on how to inspect your flashing.
- You will know when to call a professional.
![How to Spot Failing Roof Flashing Before Leaks[1]](https://creativehouseblog.com/wp-content/uploads/2026/05/How_to_Spot_Failing_Roof_Flashing_Before_Leaks1.jpg)
What Is Roof Flashing
Roof flashing is a critical part of your roof that prevents water from seeping into your home. It’s usually made of metal, like aluminum or galvanized steel, but can also be made from rubber or plastic.
Flashing is installed where roof planes meet, or where a roof meets a vertical surface, such as a chimney, vent pipe, or skylight.
Its main job is to create a watertight seal in these vulnerable areas. Without it, rain and snowmelt would easily find their way into your attic and walls, causing damage.
Think of it as the roof’s raincoat, designed to channel water away from where it can do harm.
Types of Roof Flashing
Different parts of your roof need different kinds of flashing to work best. These are designed to handle specific water flow patterns and structural connections. Each type has its own purpose and installation method to ensure maximum protection.
Understanding these differences helps in identifying problems more accurately.
Step Flashing
Step flashing is made up of small, overlapping pieces of metal. It’s used where a roof meets a vertical wall, like the side of a house or a dormer. Each piece looks like a step, with one edge laid under the roofing material above and the other edge extending under the roofing material below.This layered design ensures water is directed down the wall and away from the house. It’s a common sight around chimneys and wall extensions.
When it’s installed correctly, it’s very effective at keeping water out of these tricky spots.We often see this in older homes, and it can sometimes be a point of failure if the sealant degrades or pieces become loose.
Pipe Flashing
Also known as pipe boots or vent boots, pipe flashing seals around pipes that come through your roof. These pipes are for plumbing vents or exhaust vents. The flashing typically has a rubber gasket around the base that fits snugly against the pipe, and a metal flange that sits on the roof.This combination prevents water from running down the pipe and into your attic. Over time, the rubber can dry out, crack, and lose its seal, leading to leaks. Metal pipe flashing might corrode or loosen.Regular checks are important, especially for older rubber boots which tend to degrade faster than metal ones
Chimney Flashing
Chimney flashing is a bit more complex. It usually involves several parts. There’s a saddle flashing at the top of the chimney (on the side that slopes away from the prevailing wind) to split water.Then there’s counterflashing, where metal strips are embedded into the mortar joints of the chimney and then bent over the base flashing on the roof. This creates a very strong barrier. The base flashing covers the joint between the chimney and the roof.This type of flashing is crucial because chimneys are large penetrations and can be a common source of leaks if not properly maintained. The materials used can be sheet metal, like copper or aluminum.
Skylight Flashing
Skylight flashing is designed to seal the edges where a skylight frame meets the roof. It’s similar in concept to chimney flashing, often using a combination of base flashing, step flashing (if the skylight is on a sloped roof), and counterflashing. The goal is to create a smooth, watertight transition from the roof to the skylight structure.Water needs to be guided away from the edges of the skylight frame and down onto the roof.
Compromised skylight flashing can lead to water stains on ceilings and walls around the skylight, sometimes appearing long after a rain. The sealants used can degrade, and the metal can bend or corrode.
Common Signs of Failing Roof Flashing
Spotting problems with your roof flashing early is key to preventing serious water damage. These signs are often subtle at first but become more obvious if ignored. They usually appear around penetrations like chimneys, vents, and skylights.
Being aware of these indicators can save you a lot of money and hassle down the road. Think of them as the roof’s way of sending you an early warning signal.
Visible Damage and Deterioration
One of the most straightforward ways to tell if your flashing is failing is to look for physical damage.
Over time, weather elements like sun, rain, snow, and wind can take their toll. Metal flashing can rust, corrode, or develop holes.
Rubber boots can crack and become brittle. You might see loose pieces, bent metal, or material that looks worn out. This visible wear and tear is a direct sign that the flashing is not doing its job effectively anymore and needs attention.
Any break in the protective surface can allow water entry.
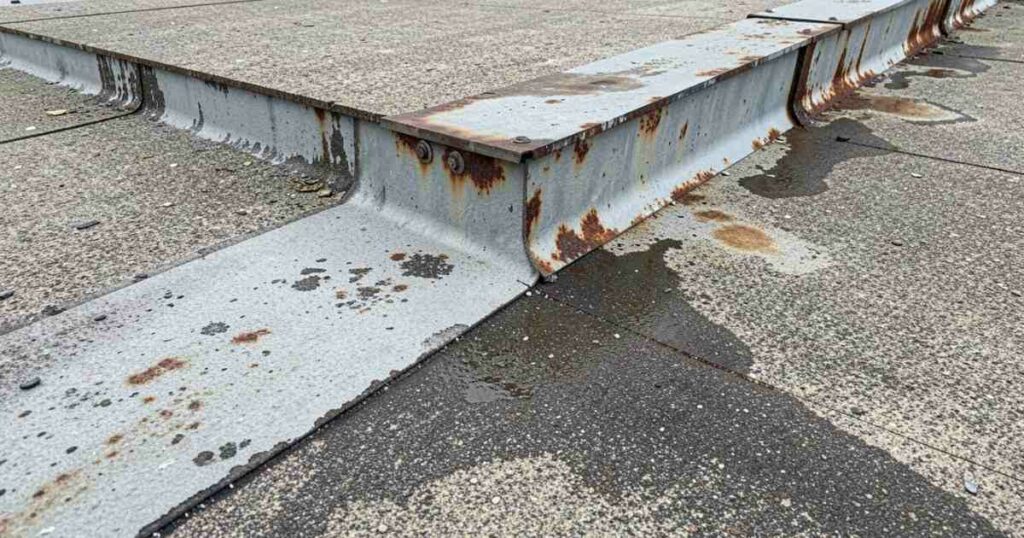
Corrosion and Rust
Metal flashing, especially if it’s made of steel or iron that isn’t properly galvanized or coated, can rust over time. You’ll see reddish-brown spots or a flaky texture on the surface. This rust weakens the metal and can create small holes, allowing water to seep through.If you notice significant rust, especially at the seams or edges of the flashing, it’s a strong indicator that
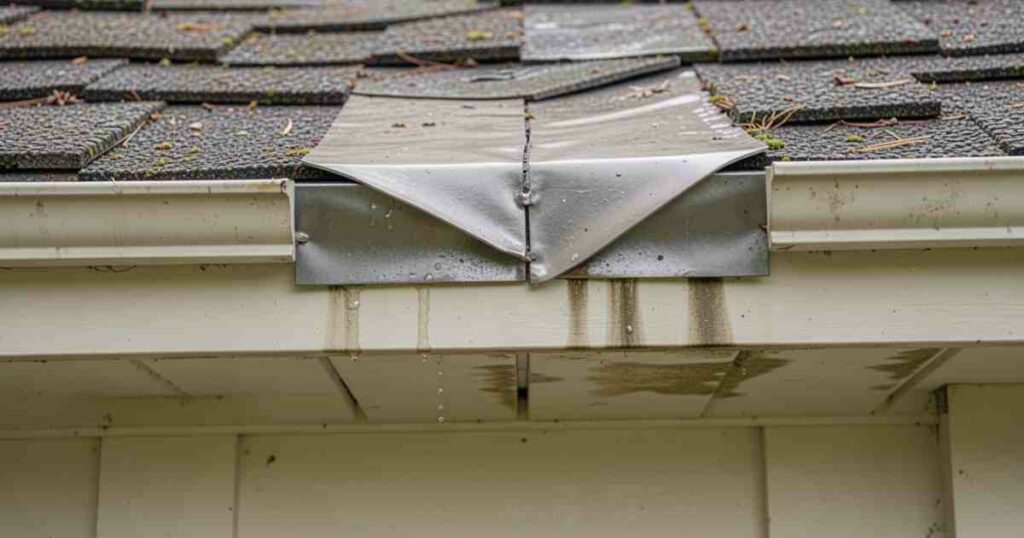
Cracks and Holes
Whether from age, UV exposure, or physical impact (like a falling branch), cracks and holes are direct entry points for water. For rubber pipe boots, you’ll see visible splits and tears. For metal flashing, you might see dents or punctures.Even small cracks can widen over time and become major leak sources. It’s important to look closely at all edges and bends in the flashing material. These aren’t always obvious from the ground, so a closer inspection might be necessary.The material’s ability to form a barrier is destroyed.
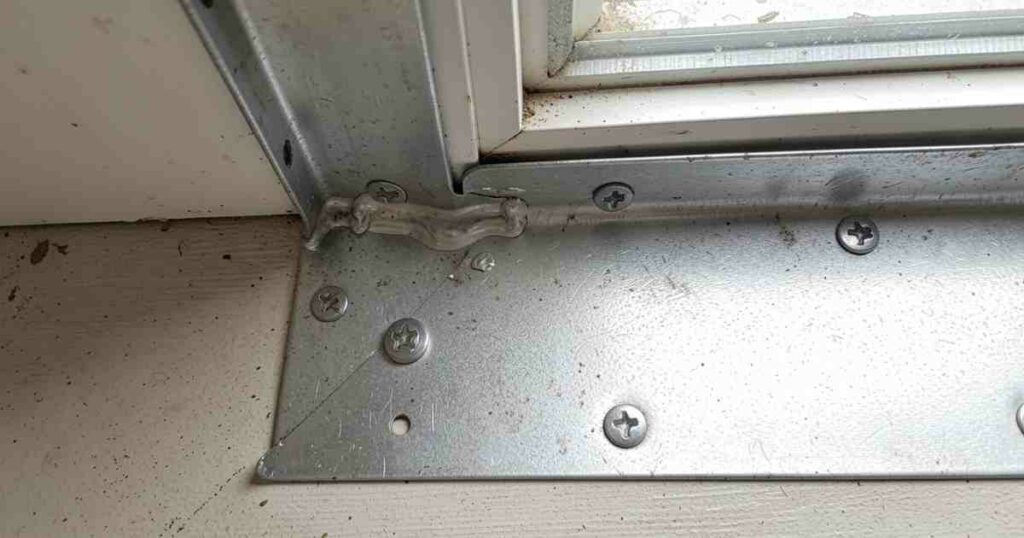
Loose or Lifted Flashing
Strong winds or improper installation can cause flashing to become loose or lift away from the roof or vertical surface. When flashing isn’t pressed firmly against the roof deck or wall, it creates a gap. This gap is an open invitation for water.You might see edges of metal sticking up or sections of flashing that appear to be pulling away. This often happens at the top or sides where the flashing is supposed to be sealed or integrated. A loose piece can flap in the wind, further damaging it and the surrounding shingles.It’s crucial that the flashing lies flat and is well-secured.
Water Stains and Damage Inside Your Home
The most definitive sign that your roof flashing is failing is when you see evidence of water damage inside your home. This damage often appears in the attic or on the ceiling below the roofline.
These stains are usually brown or yellowish and can indicate a slow leak that has been present for some time.
They are a direct result of water finding its way through compromised flashing and traveling down your home’s structure.
Stains in the Attic
Inspect your attic regularly. Look for any signs of dampness on the underside of the roof decking, on insulation, or on the rafters. Water stains are often dark or discolored patches.If you see these, especially directly above or around any roof penetrations like chimneys or vents, it’s a strong clue that flashing is the culprit. The water might not always drip directly down but can spread along the underside of the roof sheathing. You might also notice mold or mildew growth in damp areas.The wood will often appear darker and feel soft.
Discolored Ceilings
When leaks persist, water can eventually soak through your ceiling material, causing visible discoloration. These can start as small, discolored spots that grow larger over time. In severe cases, the ceiling might even start to sag or bulge.These marks are unmistakable indicators that water is getting past your roof’s defenses. They are often found in the room directly below the attic space. The paint or plaster may bubble or peel as well due to the moisture.This is a very clear signal that immediate action is required.
Damp or Wet Insulation
In the attic, check your insulation. If it feels damp or you see dark, wet patches, it’s a sign water has penetrated the roof. Wet insulation loses its effectiveness and can also lead to mold growth, which is bad for your health and the structure of your home.The moisture in the insulation points to a leak originating from above. This is a more advanced stage of a leak, meaning the flashing problem has likely been present for a while. It’s important to address the source of the moisture before replacing the insulation.
Mold and Mildew Growth
Water is the primary ingredient for mold and mildew. If your roof flashing is letting in moisture, you might start to notice these unwelcome guests.
They thrive in damp, dark environments, making attics and wall cavities prime breeding grounds.
The presence of mold, often accompanied by a musty odor, is a health concern and a sign of an underlying water intrusion problem, frequently linked to flashing issues. This growth can spread quickly if the moisture source isn’t stopped.
Musty Odors
One of the first things you might notice is a musty smell, especially in your attic or near rooms with suspected leaks. This odor is often caused by mold and mildew that are growing in damp areas due to water intrusion. The smell can be faint at first but becomes stronger as the mold proliferates.If you detect this persistent smell, it’s a good reason to investigate further for leaks, and flashing is a common origin point. The smell is your nose’s way of alerting you to hidden moisture.
Visible Mold Colonies
Beyond the smell, you might see actual patches of mold. These can appear as fuzzy or slimy green, black, white, or gray spots on surfaces like wood, drywall, or insulation. If you find these in your attic or around areas where water damage is suspected, it’s a clear indicator of a moisture problem.The source of the moisture often needs to be addressed before mold remediation can be truly effective. Early detection of mold means a smaller problem to deal with.
Why Roof Flashing Fails
Roof flashing is exposed to the elements 24/7, and over time, various factors can cause it to break down.
Understanding these reasons helps you know what to look for during inspections and why maintenance is important. It’s not just one thing, but a combination of wear and tear, environmental factors, and sometimes, installation errors that lead to failure.
These causes are common across most roofing systems and flashing types.
Age and Material Degradation
Like all materials, the components of roof flashing have a lifespan. Over years of exposure to sun, rain, wind, and temperature changes, they can become weak and brittle. Metal can corrode, rubber can dry out and crack, and sealants can lose their adhesion.
This natural aging process is one of the most common reasons flashing eventually fails. The materials simply wear out from constant exposure and stress. This is a slow process but inevitable for all roofing components.
UV Exposure
Sunlight contains ultraviolet (UV) rays, which are incredibly damaging to many materials. For rubber flashing, UV rays break down the chemical bonds, making it brittle, prone to cracking, and less flexible. Metal flashing can also be affected, as UV rays can degrade protective coatings, exposing the metal to corrosion.Constant exposure to the sun without adequate protection will shorten the lifespan of any flashing material. The intensity of the sun varies by region, but its effect is universal over time.
Temperature Fluctuations
The expansion and contraction of building materials due to temperature changes put stress on flashing. Metal expands when hot and contracts when cold, and extreme temperature swings can cause it to fatigue. Rubber and plastic components can also become brittle in cold weather and expand significantly in heat.These constant movements can break seals, loosen fasteners, and create small cracks over time. This is especially problematic in areas with dramatic daily or seasonal temperature shifts. The cyclical stress wears down the material.
Oxidation and Corrosion
Metal flashing, even when galvanized or treated, is susceptible to oxidation (rusting). This process is accelerated by moisture and salt in the air (in coastal areas). Rust not only weakens the metal but can also create sharp edges that damage roofing materials.As the metal corrodes, it loses its protective integrity, allowing water to pass through. The visual signs of rust are a clear indication of this degradation. Proper initial treatment and ongoing checks help slow this down.
Environmental Factors and Physical Damage
Your roof is exposed to the environment, and sometimes, that environment can be harsh. Strong winds, heavy snowfall, falling debris, and even walking on the roof can all cause physical damage to flashing.
These external forces can bend, tear, or dislodge the flashing, compromising its ability to seal out water.
It’s not just age; external events play a big role.
High Winds
Strong winds can lift the edges of flashing, especially if the fasteners have loosened over time. This lifting creates gaps where wind-driven rain can easily penetrate. In severe storms, winds can even tear pieces of flashing completely off the roof.You might see a loose flap of metal after a strong gust. It’s essential that flashing is securely fastened to withstand these forces. The upward pressure from wind can be immense and compromise even well-installed flashing.
Hail and Debris Impact
Falling hail or branches from trees can directly impact and damage flashing. A severe hailstorm can dent metal flashing, create small punctures, or even dislodge it. Similarly, falling branches can tear or bend flashing components.This type of impact damage creates immediate vulnerabilities in the roof’s seal. The force of impact can deform the metal or crack rubber boot components. Even seemingly minor dents can create a point of weakness.
Ice Dams
Ice dams form when snow melts and refreezes at the edge of your roof, creating a barrier that traps water. This trapped water can back up under shingles and find its way to flashing, especially around chimneys and vents. The constant freeze-thaw cycle associated with ice dams can also damage flashing by expanding and contracting water trapped in small crevices.This pressure can force water into areas it shouldn’t be. Ice dams are a particular problem in colder climates and can cause significant damage over a single winter.
Improper Installation or Repair
Even the best materials can fail if they are not installed correctly. Issues like using the wrong type of fasteners, inadequate overlap of materials, insufficient sealant, or not integrating the flashing properly with the roofing system can lead to leaks from day one.
Poorly executed repairs can also create new problems or fail to address the root cause of the leak.
Incorrect Fastening
Using the wrong type or number of fasteners can compromise the integrity of the flashing. Fasteners that are too short may not hold securely, while those that are too long can penetrate too far and cause issues. Over-tightening fasteners can also damage the flashing material or create stress points.Furthermore, nails or screws should be sealed to prevent water entry, a step sometimes missed in hurried installations. The correct placement and type of fastener are vital for long-term performance. Proper sealing over each fastener is crucial.
Inadequate Overlap
Flashing components need to overlap correctly to ensure water flows downwards and away from the building. If the overlap is insufficient, water can seep into the joint rather than being directed off the roof. This is particularly important for step flashing and counterflashing.The principle is similar to how shingles overlap; each layer sheds water onto the layer below. An improper overlap negates this protective layering effect.
Poor Sealing
Sealants, like roofing cement or specialized caulk, are often used to create a watertight bond between flashing and other roofing components. If these sealants are not applied correctly, are the wrong type, or degrade over time, they can fail. This leaves small gaps where water can enter.Over-application can also be an issue, as excess sealant can trap debris or crack. The sealant needs to be flexible enough to handle movement but durable enough to withstand the elements.
How to Inspect Your Roof Flashing
Regularly checking your roof flashing is one of the most effective ways to catch problems early.
You don’t need to be a roofing expert to do a basic inspection. With a little guidance, you can identify many common issues before they lead to expensive leaks.
Safety is paramount, so always take precautions when working at heights. A thorough visual check can save you a lot of future headaches and protect your home from water damage. Making this a part of your home maintenance routine is a smart move.
Safety First When Inspecting
Working on a roof can be dangerous. It’s essential to prioritize safety above all else. If you feel uncomfortable or unsure at any point, it’s always best to call a professional.
Your home’s integrity is important, but so is your well-being. Taking the right precautions can make the inspection process much safer and more effective.
Use a Sturdy Ladder
Ensure your ladder is in good condition, stable, and extended to the correct height. It should extend at least three feet above the roofline if you plan to step onto the roof. Make sure it’s placed on firm, level ground.Never use a damaged ladder. A proper ladder setup is the first step to safe roof access. The angle at which the ladder is placed is also important for stability.
Wear Appropriate Footwear
Always wear sturdy, closed-toe shoes with non-slip soles. This will give you better traction on the roof surface and help prevent slips and falls. Avoid wearing sandals, smooth-soled shoes, or anything that could compromise your grip.Good footwear is a simple but critical safety measure. The material of the sole can make a big difference on slick surfaces.
Check Weather Conditions
Never go onto your roof during or immediately after rain, snow, or high winds. The roof surface will be slippery and dangerous. Wait for dry, calm conditions.Inspecting on a sunny but not excessively hot day is ideal. Extreme temperatures can also make surfaces more hazardous. Always wait for the roof to be completely dry before stepping on it.Your safety is the top priority.
Consider a Drone Inspection
For those who are very uncomfortable with heights or want a quick overview, a drone can provide excellent aerial views of your roof. Many companies offer drone inspection services. This allows you to see the overall condition of your roof and identify areas that might need a closer look without putting yourself at risk.The high-resolution cameras can capture details that might be missed from the ground. It’s a modern solution for a common homeowner challenge.
Ground-Level Visual Inspection
Before you even think about climbing on the roof, a thorough inspection from the ground can reveal a lot.
Armed with binoculars, you can often spot obvious signs of trouble without risking a fall. Look for sagging areas, missing shingles, or anything that looks out of place around chimneys, vents, and skylights.
This is the safest first step in assessing your roof’s condition.
Examine Valleys
Roof valleys are the V-shaped channels where two roof slopes meet. These areas collect a lot of water and are often where flashing is installed. Look for any signs of missing or damaged shingles in the valley, or if the flashing material itself is visible, cracked, or corroded.Pay attention to where the flashing meets the shingles and if it appears to be pulling away. The flashing in valleys is critical for preventing leaks at these high-water-flow areas.
Check Around Chimneys and Vents
Use your binoculars to get a close look at the flashing around your chimney and any vent pipes that protrude from the roof. Look for any metal that appears rusted, bent, or loose. For vent pipes, check the condition of the rubber boot.If you see any gaps, cracks, or areas where sealant has pulled away, these are potential leak points. These penetrations are prime spots for water intrusion, so they need careful attention.
Inspect Skylight Edges
If you have skylights, examine the edges where the skylight frame meets the roof. Look for any signs of sealant failure, gaps, or damage to the flashing. Water can easily find its way in if this seal is broken.You might see curling shingles around the skylight or visible discoloration on the exterior frame. The flashing here needs to be seamlessly integrated with the roof to be effective.
Roof-Level Inspection (With Caution)
If you decide to inspect from the roof itself, take extreme caution. Once on the roof, focus your attention on the flashing around all penetrations and roof edges. Gently probe the material to check for flexibility or brittleness.
Look for any signs of deterioration or damage that you might have missed from the ground.
Examine Flashing Materials
Get up close to the flashing. If it’s metal, check for rust, corrosion, dents, or sharp edges. If it’s a rubber boot around a pipe, feel it to see if it’s cracked, brittle, or feels dry and worn.If it’s caulk or sealant, check if it’s cracked, peeling, or has pulled away from the roof surface or the penetration. Any sign of degradation means it’s time for repair or replacement. The flexibility of rubber boots is often the first thing to go.
Look for Debris Trapped Under Flashing
Sometimes, leaves, twigs, or other debris can get lodged under the edges of flashing. This can prevent it from lying flat and creating a proper seal. It can also trap moisture, accelerating corrosion.
Gently remove any debris you find, but be careful not to damage the flashing in the process. This debris can act like a small wedge, lifting the flashing just enough to allow water in. Cleaning these areas is a simple maintenance task.
Check Shingle Condition Around Flashing
The shingles surrounding the flashing are also important. Look for any shingles that are curled, cracked, loose, or missing, especially near penetrations. Damaged shingles can compromise the seal that the flashing is supposed to create.Sometimes, the problem isn’t with the flashing itself, but with the shingles that protect its edges. Ensure the shingles are lying flat and are in good condition. These shingles are often referred to as “apron” or “step” shingles.
When to Call a Professional
While DIY inspections are valuable, there are times when it’s best to call in the experts. If you find significant damage, are uncomfortable with heights, or are unsure about what you’re seeing, a professional roofer has the experience and tools to diagnose and fix the problem correctly. They can also perform more in-depth inspections and offer long-term solutions.
Knowing your limits is a sign of good home maintenance practice.
Extensive Damage Detected
If your inspection reveals widespread rust, large holes, significant cracks, or areas where flashing is completely missing, it’s time to call a pro. These types of issues often require specialized knowledge and tools to repair or
Safety Concerns
If you are not comfortable working at heights, have balance issues, or if your roof is particularly steep or high, do not attempt a roof-level inspection. Your safety is more important than finding a small leak. A professional roofer is trained and equipped to work safely on any roof.They have safety harnesses, ropes, and experienced personnel. Don’t take unnecessary risks; let the pros handle it. There are many hazards associated with roof work.
Persistent Leaks Despite Repairs
If you’ve noticed leaks and even attempted some repairs, but the problem persists, it might be time to bring in an expert. Sometimes, the leak source is harder to find than it appears, or there might be multiple issues. A professional can use specialized leak detection methods and has the experience to identify the root cause of recurring leaks.They can also advise on whether more extensive roof repairs or a full replacement are necessary. A fresh set of experienced eyes can solve persistent mysteries.
Real-Life Examples and Scenarios
Seeing how flashing problems have affected real homes can help you better understand the importance of checking yours.
These stories highlight common issues and the outcomes, both good and bad, depending on how quickly the problem was addressed.
They offer practical lessons for homeowners dealing with potential roof leaks and flashing failures.
Every roof is different, but the principles of protecting it remain the same.
Case Study 1 The Neglected Vent Pipe Boot
The Miller family had a small, almost unnoticeable water stain on their living room ceiling for months.
They figured it was just an old house settling and ignored it. One day, after a heavy rain, a drip started.
Upon closer inspection by a roofer, it was discovered that the rubber boot around their bathroom vent pipe had completely cracked and degraded due to years of UV exposure and lack of maintenance.
The constant moisture had slowly seeped into the attic and then through the ceiling drywall.
The roofer replaced the boot, but the Millers also had to pay for attic insulation repair and ceiling drywall patching.
Had they checked the vent boot during their annual roof inspection, they could have replaced it for a fraction of the cost and avoided the interior damage.
Case Study 2 The Rusted Chimney Flashing
In a coastal town, the constant salt spray accelerated the corrosion of a home’s chimney flashing.
The homeowner noticed some reddish-brown streaks on the brickwork and assumed it was just dirt.
During a routine check, a roofer pointed out that the metal flashing at the base of the chimney had rusted through in several spots.
This allowed water to flow directly into the attic space and along the attic floor. The homeowner had to have the rusted flashing replaced and also had to address some minor water damage to the attic framing.
The roofer also advised on using more corrosion-resistant flashing material for future repairs given the location.
This case highlights how environmental factors can dramatically speed up material degradation.
Sample Scenario 1 A Loose Step Flashing Piece
Imagine you’re inspecting your roof and notice a piece of metal step flashing near your dormer window looks like it’s sticking up slightly. It’s not severely damaged, but it’s not lying flat against the roof. You might be tempted to leave it.
However, even a small gap can let in wind-driven rain, especially during storms. If left unaddressed, this could lead to water seeping behind your siding or into the wall cavity, causing rot and mold.
A simple fix would be to gently press it down and secure it with roofing sealant and perhaps a new, appropriately sized fastener.
This prevents a small issue from becoming a big problem.
Sample Scenario 2 Moldy Attic Odor
You notice a persistent musty smell when you go into your attic. You look around and see some dark spots on the underside of the roof decking near your chimney. You also notice that the insulation in that area feels slightly damp.
This is a classic sign that water is getting in somewhere above. Your first thought should be the flashing around the chimney.
A professional inspection would confirm if the flashing is the source, and then it would need to be repaired or replaced to stop the moisture intrusion and prevent further mold growth and structural damage.
How to Maintain Your Roof Flashing
Just like any part of your home, roof flashing needs regular care to ensure it performs its job effectively for years to come.
Proactive maintenance is far more cost-effective than dealing with the aftermath of a leak. Simple steps taken periodically can significantly extend the life of your flashing and protect your entire roof system.
Think of it as preventative medicine for your house.
Regular Inspections
The cornerstone of any good maintenance plan is regular inspection. Schedule checks of your roof flashing at least twice a year, preferably in the spring and fall.
These times are good because you can assess any damage from winter weather in the spring and prepare for winter conditions in the fall.
Also, inspect after any severe weather events, like high winds or hail storms. Catching small issues early prevents them from becoming major problems.
Spring Inspection
After the winter months, your roof has endured ice, snow, and temperature fluctuations. This is a critical time to check for any damage caused by ice dams, freezing and thawing cycles, or heavy snow loads. Look for any signs of loose or damaged flashing, especially around chimneys, vents, and skylights.
This inspection helps ensure your roof is ready for the warmer, wetter months ahead.
Fall Inspection
As the weather cools and storms become more frequent, a fall inspection is vital. This check helps you identify any issues that might have arisen during the summer, such as damage from heat or strong winds. It also prepares your roof for the coming winter.
Ensuring flashing is in good shape will help prevent ice dams from forming and causing water backup. This proactive step can save you from costly winter repairs.
Post-Storm Check
Whenever your area experiences severe weather, such as high winds, heavy rain, or hail, it’s wise to conduct an immediate inspection of your roof. High winds can lift or dislodge flashing, while hail can cause direct impact damage. Even if you can’t go onto the roof yourself, a ground-level visual inspection with binoculars can spot obvious problems like loose pieces or dents.
If you see anything concerning, schedule a professional inspection promptly.
Cleaning and Debris Removal
Keeping your roof clean is essential. Debris like leaves, twigs, and dirt can accumulate around flashing, trapping moisture and accelerating corrosion or decay. This debris can also prevent flashing from lying flat, creating gaps where water can enter.
Regularly clearing this material ensures that your flashing can do its job effectively.
Clearing Gutters and Downspouts
While not directly related to flashing, clear gutters and downspouts are crucial for overall roof health. Clogged gutters can cause water to back up onto the roof and around roof edges and penetrations, increasing the risk of leaks. Keeping them free of debris ensures water is channeled away from your foundation and roof structure.
This also reduces the strain on your roofing system.
Removing Debris from Roof Surfaces
Pay special attention to areas around chimneys, vents, and skylights. Leaves and dirt can easily get trapped under the edges of flashing. Gently remove this debris using a soft brush or a leaf blower.Be careful not to damage the flashing material or surrounding shingles while cleaning. Keeping these areas clear is a simple but effective way to maintain the integrity of the seal.
Sealing and Caulking
Over time, the sealants used with flashing can crack or dry out. Periodically inspecting and reapplying roofing sealant or caulk where needed can prevent water intrusion. This is especially important around the edges of metal flashing and where pipe boots meet the roof deck.
Using high-quality, UV-resistant roofing sealant designed for exterior use is key.
Using the Right Sealant
Not all sealants are created equal. Use products specifically designed for roofing applications, such as high-grade silicone sealants or roofing cement. These products are formulated to withstand extreme temperatures, UV exposure, and the movement of building materials.Always check the product’s compatibility with your specific flashing material (e.g., metal, rubber) and roofing type. An incorrect sealant can fail quickly or even damage the material it’s applied to.
Proper Application Technique
When applying sealant, ensure the surfaces are clean, dry, and free of loose material. Apply a continuous bead of sealant to fill any gaps. For metal flashing, ensure it’s pressed down firmly before applying sealant around the edges.
For pipe boots, seal the seam between the boot and the pipe, and around the flange where it meets the roof. Smooth the sealant with a putty knife or gloved finger for a watertight finish. Avoid over-applying, as this can create its own issues.
Frequently Asked Questions Of How to Spot Failing Roof Flashing Before Leaks
Question: How often should I inspect my roof flashing?
Answer: It’s recommended to inspect your roof flashing at least twice a year, in the spring and fall. You should also inspect it after any severe weather events like storms with high winds or hail.
Question: Can I fix failing roof flashing myself?
Answer: Minor issues, like a small crack in sealant or a piece of debris under flashing, might be DIY-friendly. However, for significant damage like rust-through, large holes, or extensive cracking, it’s best to call a professional roofer for safety and effective repair.
Question: What are the most common places for roof flashing to fail?
Answer: The most common failure points are around chimneys, vent pipes, skylights, and in roof valleys, as these are areas where the roof structure is penetrated or changes direction.
Question: What is the typical lifespan of roof flashing?
Answer: The lifespan varies greatly depending on the material, quality of installation, and environmental exposure. Metal flashing can last 20-30 years if well-maintained, while rubber boots may only last 10-15 years before needing replacement.
Question: If I see a water stain on my ceiling, is it definitely a flashing problem?
Answer: A water stain on your ceiling is a strong indicator of a roof leak, and failing flashing is a very common cause. However, other issues like damaged shingles, ice dams, or even plumbing problems in an upper floor could also be the culprit. A professional inspection is needed to confirm the exact source.
Summary
Knowing How to Spot Failing Roof Flashing Before It Causes Leaks empowers you to protect your home.
By regularly checking for rust, cracks, loose pieces, and interior water stains around chimneys, vents, and skylights, you can catch problems early.
Addressing these signs with timely maintenance or professional repair prevents costly water damage, mold, and structural issues, keeping your home dry and secure.
![8 Ways To Improve Your Home Espresso Taste[1]](https://creativehouseblog.com/wp-content/uploads/2026/04/8_Ways_To_Improve_Your_Home_Espresso_Taste1-768x448.jpg)
![Choosing The Right Air Fryer Size[1]](https://creativehouseblog.com/wp-content/uploads/2026/03/Choosing_The_Right_Air_Fryer_Size1-768x448.jpg)
![6 Reasons Your Espresso Tastes Bitter[1]](https://creativehouseblog.com/wp-content/uploads/2026/04/6_Reasons_Your_Espresso_Tastes_Bitter1-768x448.jpg)
![6 Reasons Your Fried Food Turns Out Too Greasy[1]](https://creativehouseblog.com/wp-content/uploads/2026/04/6_Reasons_Your_Fried_Food_Turns_Out_Too_Greasy1-768x448.jpg)
![6 Reasons Your Milk Isn’T Frothing Properly[1]](https://creativehouseblog.com/wp-content/uploads/2026/04/6_Reasons_Your_Milk_IsnT_Frothing_Properly1-768x448.jpg)
![How to Maintain Window Seals for Fewer Draughts and Damp[1]](https://creativehouseblog.com/wp-content/uploads/2026/05/How_to_Maintain_Window_Seals_for_Fewer_Draughts_and_Damp1-768x403.jpg)